Build the employee register: people, departments and locations
What this does
The Employees app holds one record per person who works for you — office, factory or site. That record is the anchor everything later in this journey hangs off: the skills and certificates, the working schedule behind the hours, the hourly cost behind the timesheets, and the badge and PIN the shop-floor terminal reads. This article covers the register itself: creating people, organising them into departments and locations, and what every tab of the employee form holds.
Before you start
- You have HR access — regular users see only the public Directory; the full employee form with its private tabs needs an HR role.
- Sketch the department tree first — each department names a manager, and the org chart and filters are built from it.
Load the workforce
-
01
Open Employees › Departments and create the units you actually run — fabrication, installation, technical office, sales, administration — naming a Manager and, where useful, a parent department.
-
02
Add the places people work under Configuration › Employee › Work Locations — the factory, the showroom, the site offices — each attached to a company address.
-
03
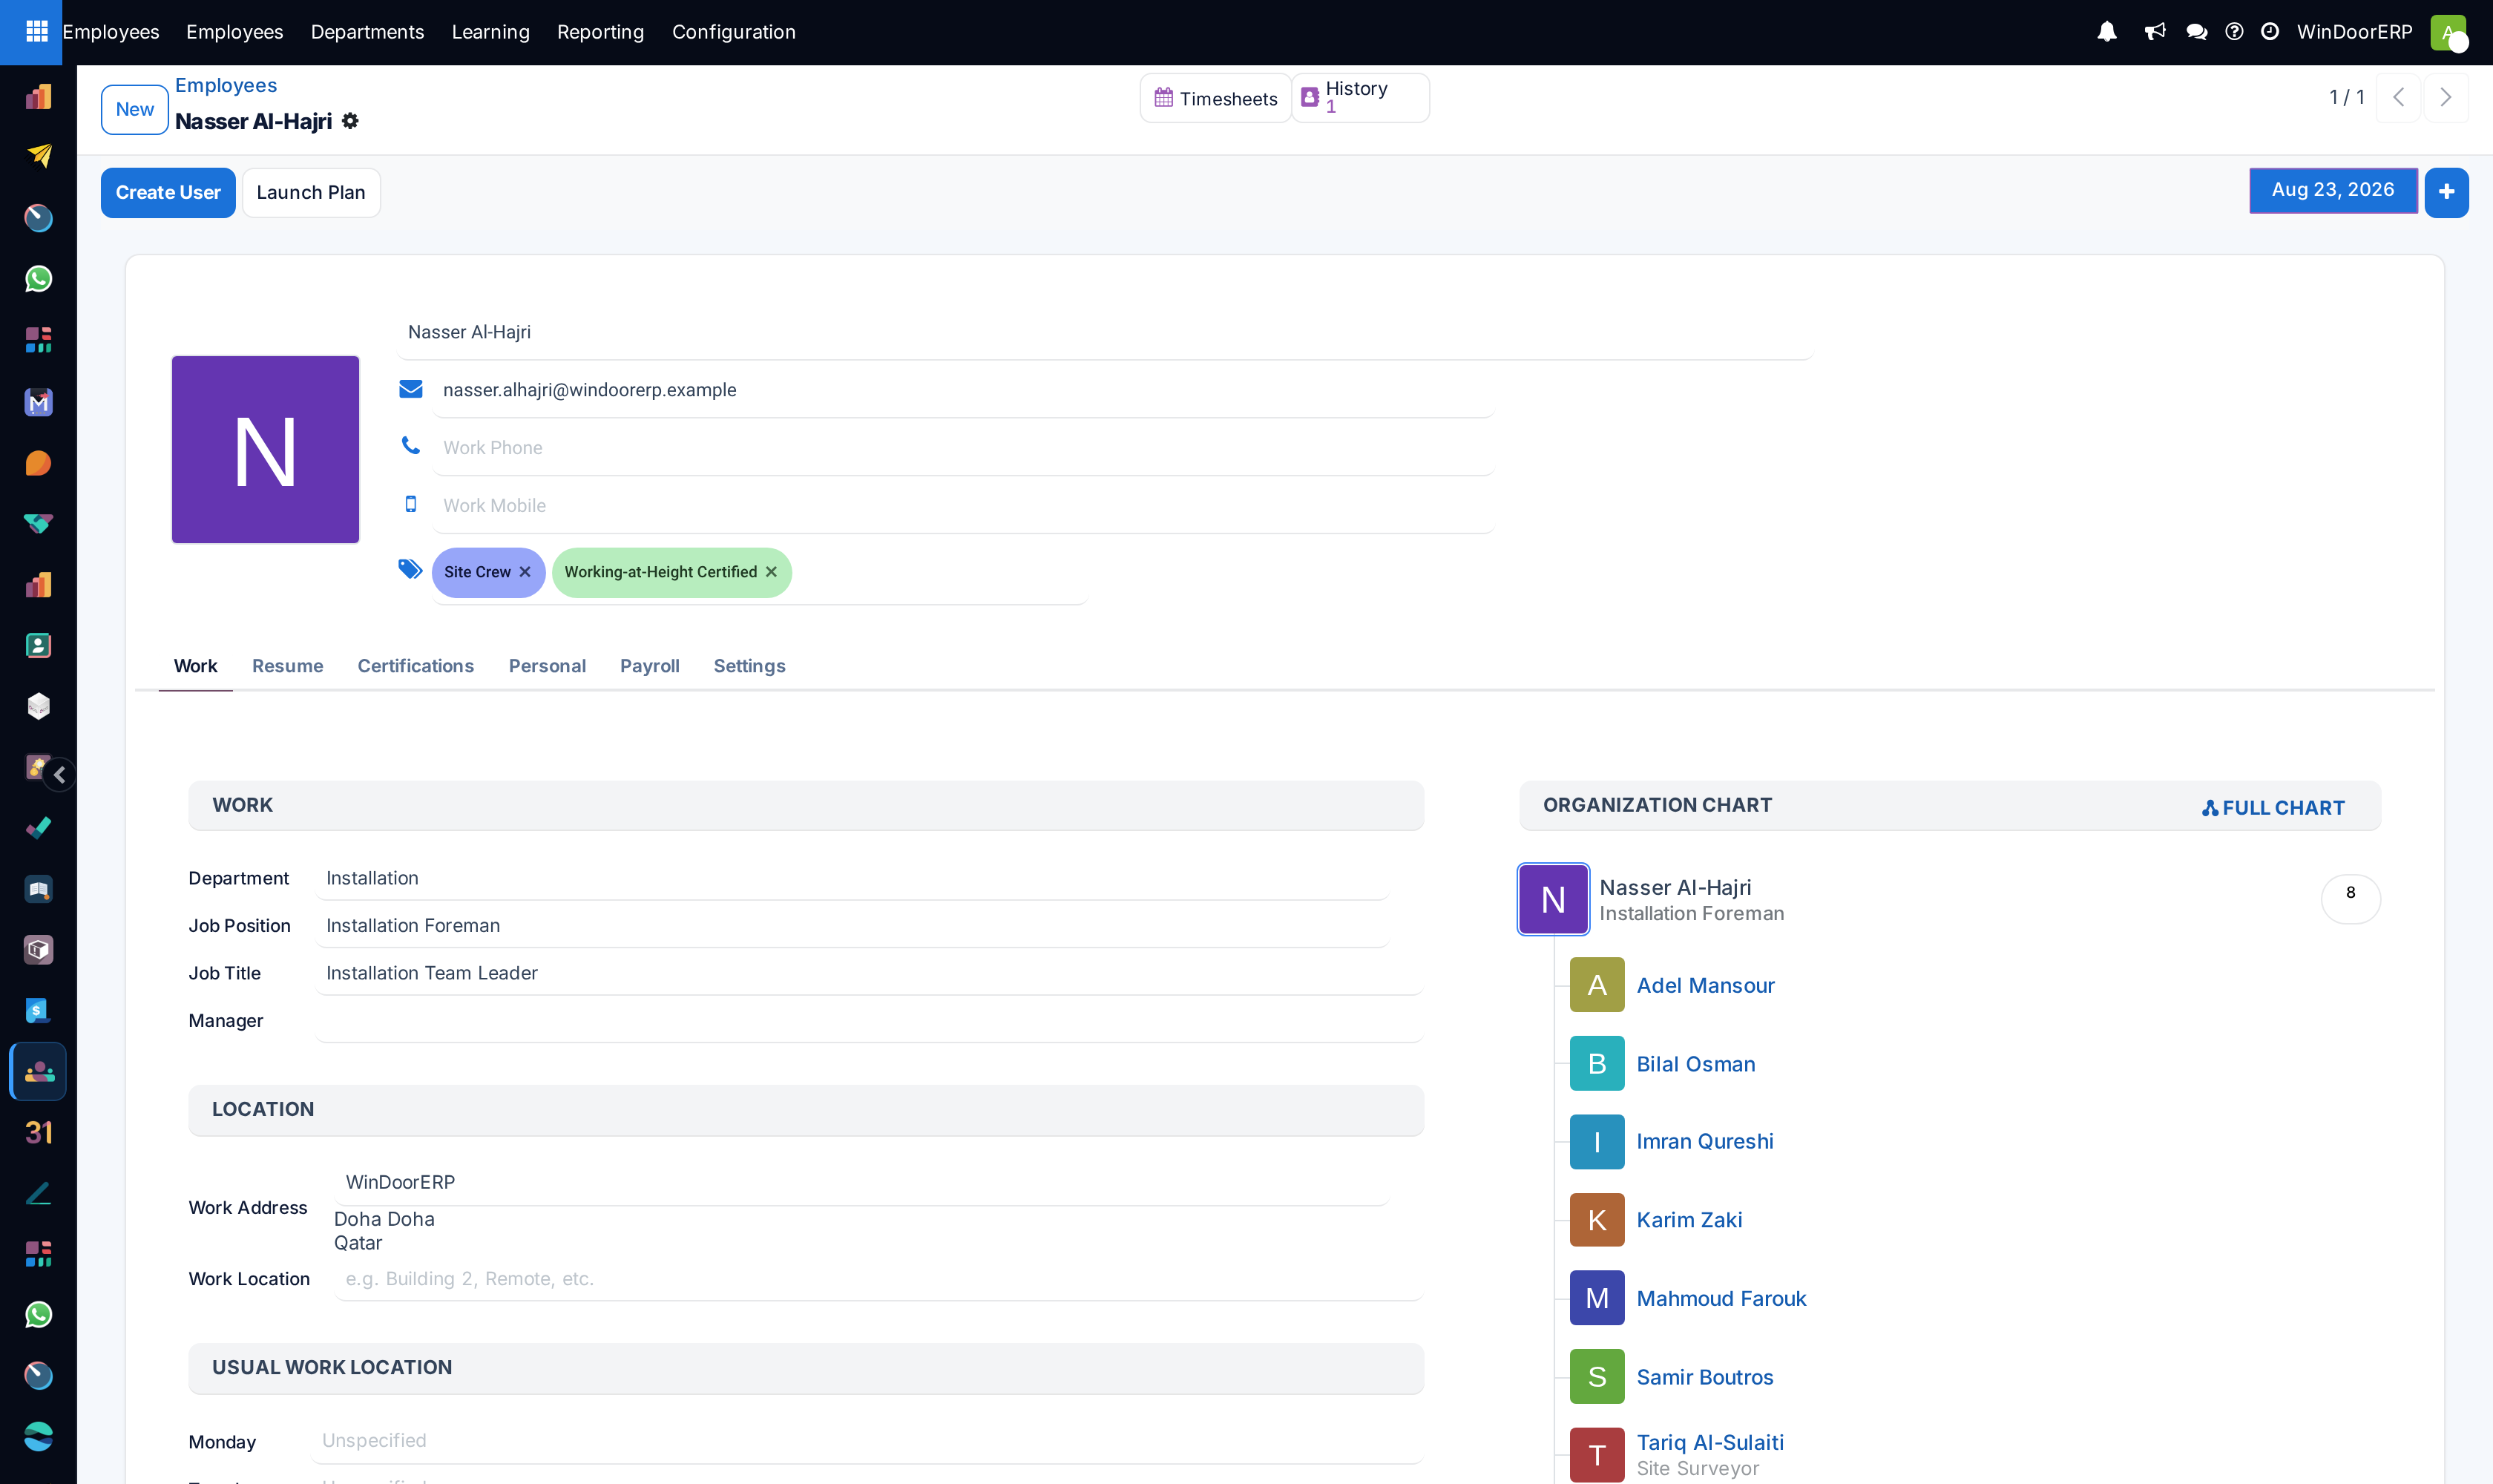
Open Employees › Employees and press New for each person: name, Work Email, Work Phone/Work Mobile, then on the Work tab the Department, Job Position (plus a free Job Title) and the Manager.
-
04
For people who log into WindoorERP, press Create User (or link an existing one on the Settings tab) — an employee record alone does not sign in.
-
05
For factory operators, set the PIN Code and Badge ID on the Settings tab (with Generate and Print Badge) — these are what the production terminal will read.
The employee form, tab by tab
| Tab | What it holds |
|---|---|
| Work | Department, Job Position and free Job Title, Manager, work address and Work Location — plus a usual-location line per weekday for people who split the week between sites, and the live Organization Chart panel with a Full Chart link. |
| Resume | The person's history as dated lines (experience, education, courses) and their current skills with levels — covered in the skills topic. |
| Certifications | Certificates with validity dates; the tab appears once certification-type skills exist. |
| Personal | Private contact details, bank accounts (with a salary-allocation wizard and a trusted-account toggle), legal name and civil data, ID, social security and passport numbers, and the Visa and Work Permit numbers with their expiry dates and document — the fields Gulf compliance runs on. |
| Payroll | The employment terms: contract Start/End Date, Wage, employee type, Contract Type, Pay Category and the Working Schedule. Load a Template fills the terms from a contract template. |
| Settings | The linked User, timezone, HR Responsible, the Hourly Cost that prices this person's timesheet hours, and the PIN Code and Badge ID. |
The header carries Launch Plan — run an onboarding or departure checklist from the plans topic — and smart buttons for the person's Timesheets and their contract History (each change of terms is kept as a dated version).
Employees, Directory and Departments
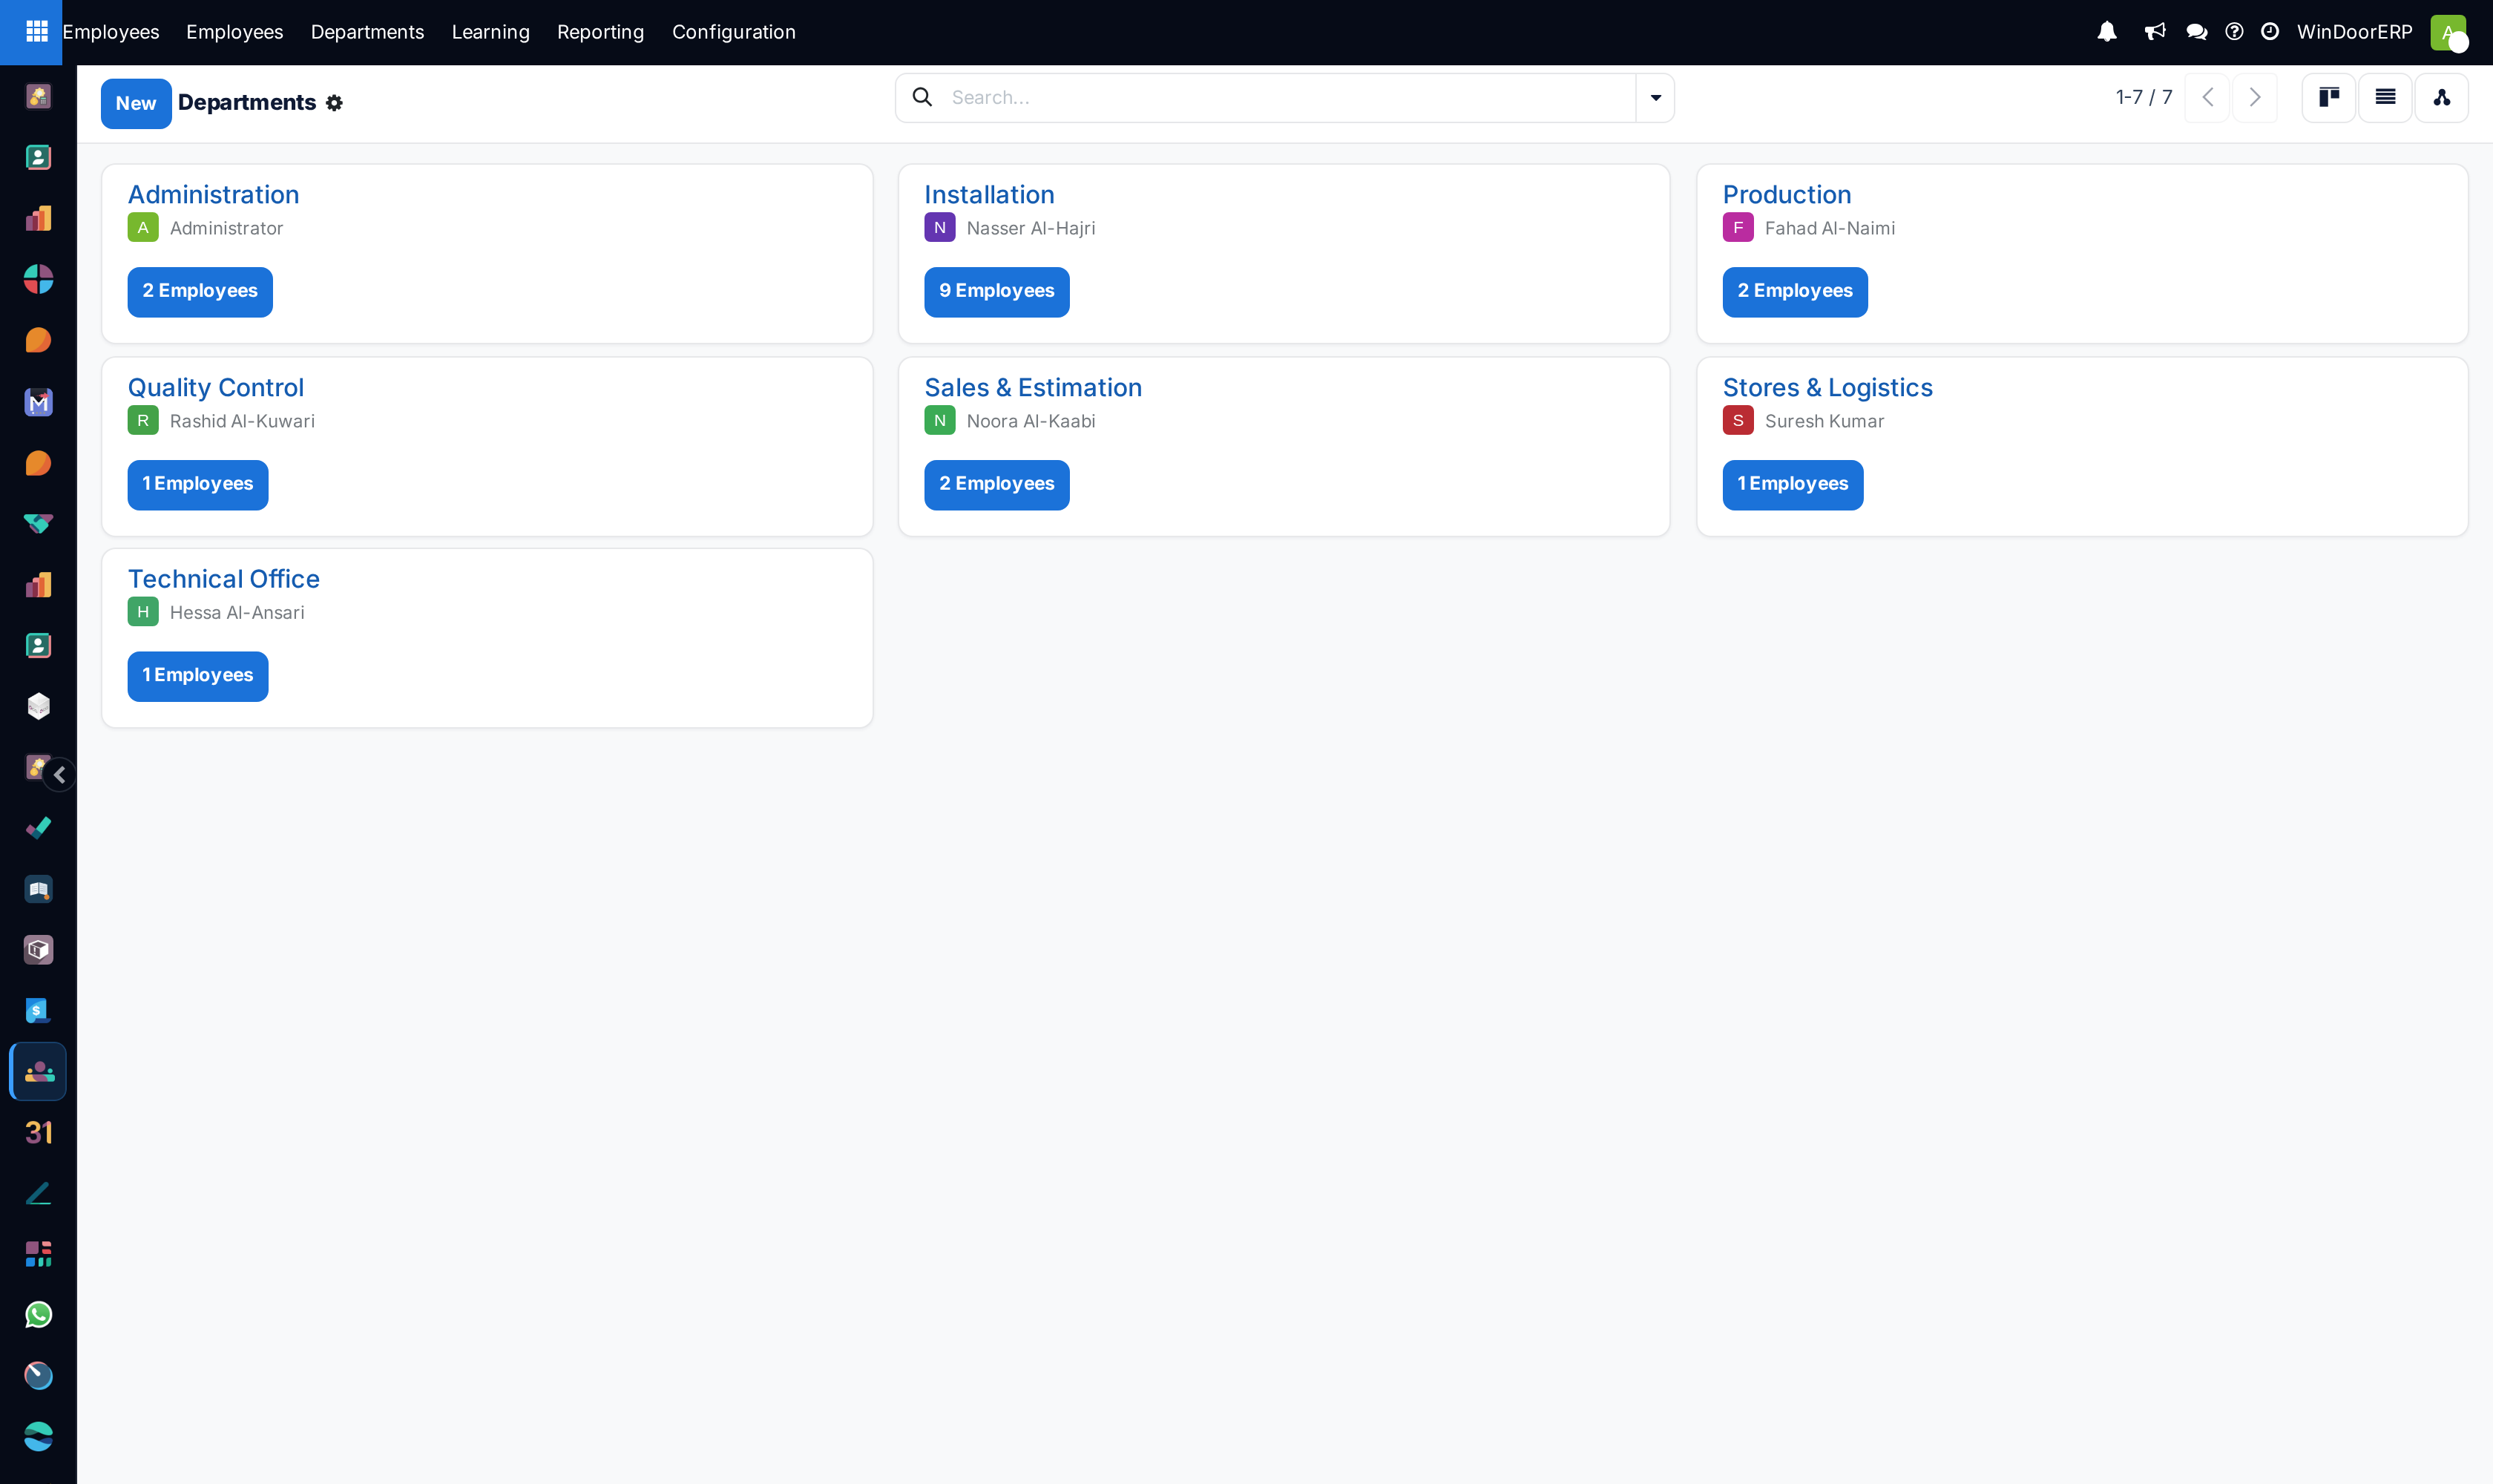
Employees opens as a kanban of cards, with list, activity, graph and pivot views behind it, and a left panel filtering by department. It is the HR working view. Directory is the same people through a deliberately limited lens — name, position, department, work contact — readable by every user, so the factory can look up a colleague without seeing wages or passports. Departments shows each unit as a card with its headcount; opening one filters its people and names its manager.
When someone leaves
Do not delete the record — archive it. Archiving an employee opens the departure dialog asking for a Departure Reason, a description and the departure date; the reasons list is maintained under Configuration › Employee › Departure Reasons. The archived record keeps the history — hours, skills, contracts — out of the active lists but on the books.
Troubleshooting
A new employee cannot log in — an employee record is not an account. Press Create User, or link an existing user on the Settings tab.
A colleague opens an employee and sees only public fields — expected: the Personal, Payroll and Settings tabs are HR-only; everyone else gets the Directory view of the same person.
The shop-floor terminal rejects an operator — the PIN Code or Badge ID on their Settings tab is empty or mistyped; that tab is where the terminal credentials live.
Timesheet costs show zero for someone — their Hourly Cost on the Settings tab was never set; hours are priced at that rate from the moment it is filled.
Common mistakes
- Creating users without employees, or employees without users, for the same person — link them once and both sides stay consistent.
- Leaving the Manager field empty — the org chart, approval routing and the department panel all read it.
- Deleting leavers instead of archiving them, losing the hours and certificates history an audit will ask for.
Was this article helpful?
Thanks — your feedback helps.
Running a window or door factory?
Ask for a demo