Find where stock is sitting
What this does
Breaks stock down by the place it is standing in, which answers three questions the stock report cannot: where is it, what is stuck in the wrong place, and what did we hold on a given date.
Before you start
- Storage Locations must be enabled in Inventory › Configuration › Settings.
Steps
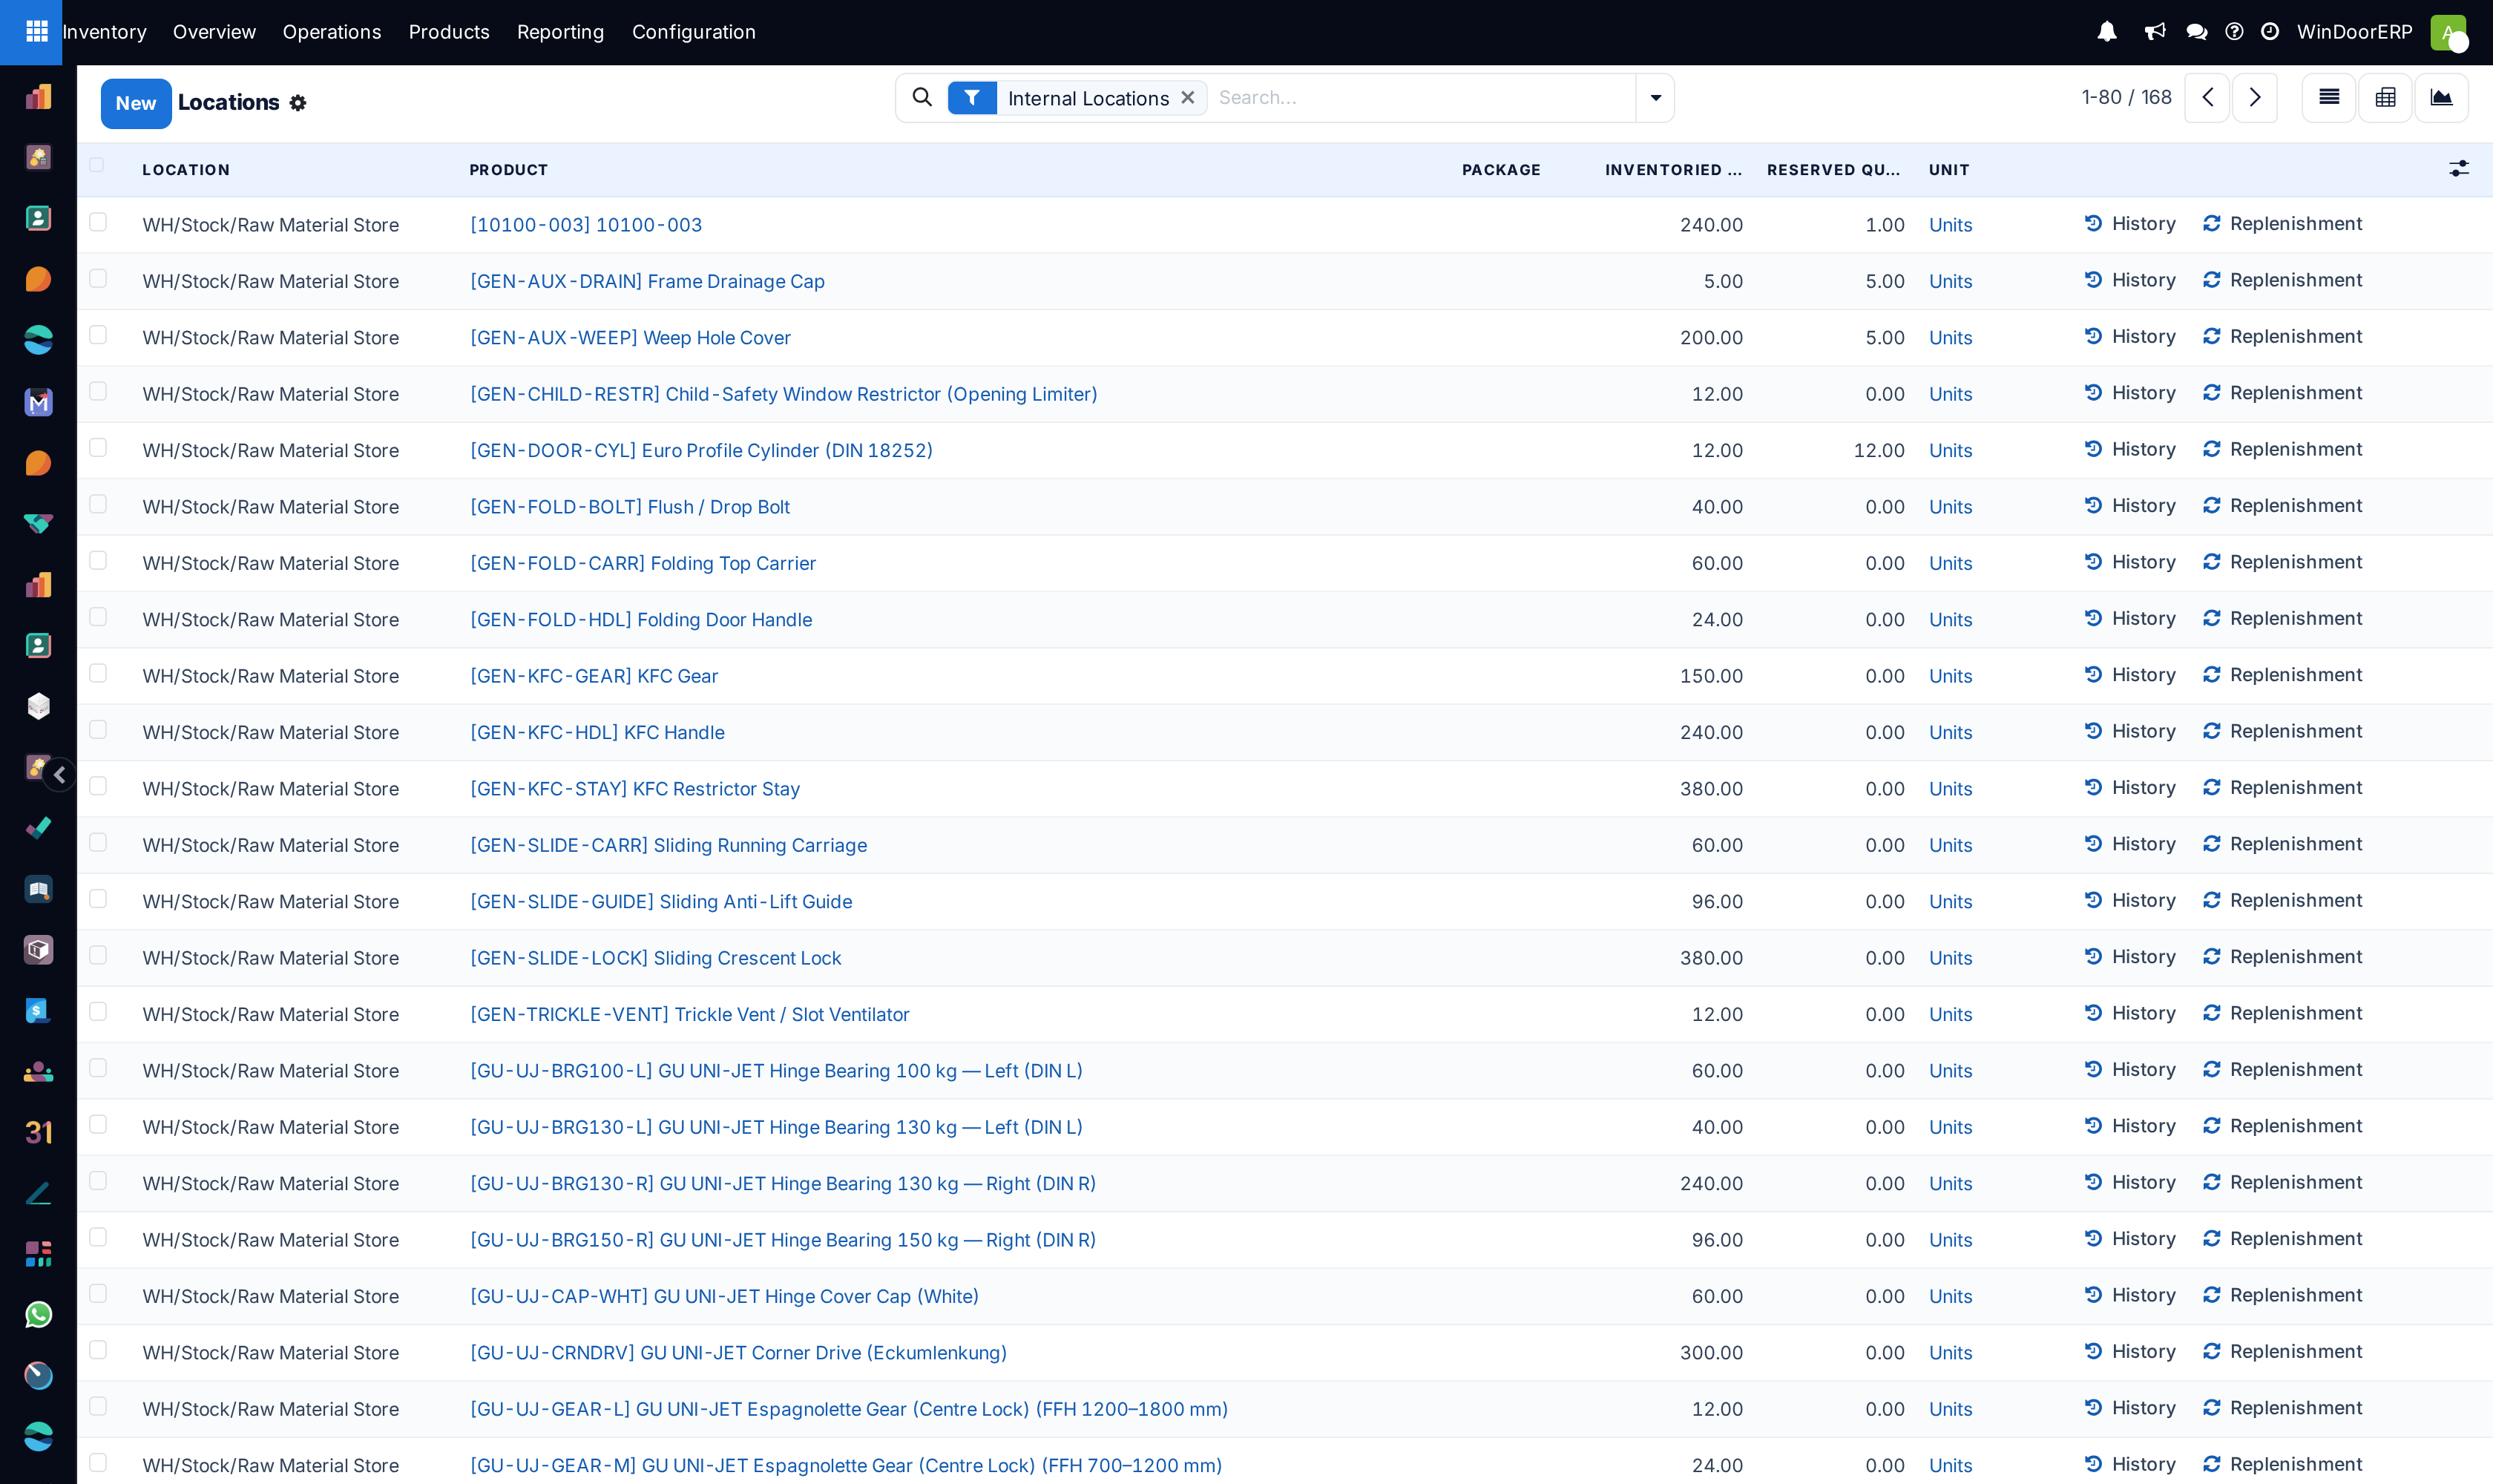
The Locations report in the Inventory application provides an overview of on-hand storage locations for company products. Use this report to see where stock is stored, identify misplaced items, or view past inventory to see product locations on specific dates.
To access the Locations report, the Storage Locations feature must be enabled. To do that, go to Inventory app › Configuration › Settings. In the Warehouse section, tick the checkbox for Storage Locations, and click Save. Then, access the main Locations report by navigating to Inventory app › Reporting › Locations.
Note
The Reporting menu in Inventory is only accessible to users with admin access.
-
01
Go to Inventory › Reporting › Locations.
-
02
Read each line: the Location, the Package, the Lot/Serial Number, the On Hand Quantity and how much of it is Reserved. A product in two places appears twice.
-
03
Click History on a row to see every move that brought it there.
-
04
Use Inventory At Date to rebuild the picture as it was on any past date and time.
Navigate the report
By default, the Locations report lists all on-hand products in stock (in the Product column), along with the following information:
- Location: current storage location. If a product is stored at
Shelf 1andShelf 2, the product is listed twice, showing quantities at each location. - Package: the package that the product is stored in, if any.
- Lot/Serial Number: if the product has a lot or serial number, it is specified here.
- On Hand Quantity: current quantity of products. Click the (edit) icon to modify the on-hand quantity.
- Reserved Quantity: on-hand quantity reserved for operations, such as pickings, delivery orders, or manufacturings.
- Unit: the unit of measure of the product.
Click the buttons to the right of each row item to access additional information:
- History: access the stock move history of the product, displaying information about the quantity and description of why the product was moved from one location to another.
Tip
View what the product is reserved for, by clicking the History button on the far-right of the product line.
On the Moves History page, remove the Done filter from the search bar to reveal filter options, and select the To Do filter.
- Replenishment: access the reordering rules page to replenish products at the specific location.
In the upper-left corner of the page, click the New button to make an inventory adjustment to record quantities of a certain product at a specific Location.
To view products, quantities, and their locations for a specified date, click the Inventory At Date button (also located in the upper-left corner of the page). Select a date and time in the Inventory at Date field, then click Confirm.
View empty locations
To view which locations are currently empty, navigate to Inventory › Configuration › Locations.
Empty locations are designated by the checkbox in the Is Empty column. To show only empty locations, click into the search bar and select the Empty Locations filter.
Generate reports
After learning how to navigate the locations report, it can be used to create and share different reports.
A few common reports that can be created using the Locations report are detailed below.
Dead stock report
To get list of expired items, also referred to as dead stock, follow these steps:
- Go to Inventory app › Reporting › Locations.
- Then, click into the search bar to reveal a drop-down list of Filters, Group By, and Favorite options.
- Enable the Internal Locations and Expiration Alerts option under the Filters section.
The report now displays a list of expired products.
Note
This report can also be generated from the Lot and Serials Numbers page, accessed by going to Inventory app › Products › Lots/Serial Numbers.
Stranded inventory report
Businesses using multi-step flows in the Inventory or Manufacturing apps, may have stranded items, which are products not in their proper storage locations, due to human error. Use this report to periodically check transfer locations (e.g. WH/Input, WH/Pre-Processing) to ensure items are moved to their intended storage locations, and accurately recorded in the database.
To get a list of items that might be sitting idly in storage, follow these steps:
- Go to Inventory app › Reporting › Locations.
- In the search bar, begin typing the name of the location where products are intended to be moved to, such as
WH/Input, orWH/Packing. - Select the Search Location for: [location name] option from the resulting drop-down menu that appears beneath the search bar.
The report now displays a list of products at the transit location.
Example
Searching Input in Location shows a list of products at a WH/Input location.
The list shows 500 quantities of Chicken, which is alarming if not refrigerated soon after reception. The stranded inventory report helps identify items that have been idling in non-storage locations.
Inventory discrepancy report
To generate a report of items that have been moved since the last inventory audit, follow these steps:
- Go to Inventory app › Reporting › Locations.
- Then, click into the search bar to reveal a drop-down list of Filters, Group By, and Favorite options.
- Enable the Internal Locations and Conflicts option from the Filters section.
- The report now displays items whose quantities have changed since the last cycle count.
- Click the History button to view inventory transfers, including receipts and deliveries, that have occurred since the inventory adjustment.
Find goods stranded in transit areas
Multi-step flows leave things behind: a pallet unloaded at
WH/Input that nobody put away. Type the location name in the
search bar and pick Search Location for: — everything
still sitting there is listed.
Two more reports worth saving
- Dead stock — filter on Internal Locations plus Expiration Alerts to list goods past their date, such as sealant and adhesives.
- Discrepancies — filter on Internal Locations plus Conflicts to list products that moved since the last count, which is what makes a count argument resolvable.
Empty locations are listed separately: Inventory › Configuration › Locations, with the Empty Locations filter.
Common mistakes
- Never checking the input and packing areas, so half a delivery quietly lives on the dock for a month.
- Reading a quantity without its reserved column and promising it to somebody.
- Using this report on a database where storage locations were
never really adopted — everything shows as
WH/Stock.
Was this article helpful?
Thanks — your feedback helps.
Running a window or door factory?
Ask for a demo