Track installed openings, their serials, and their warranties
What this does
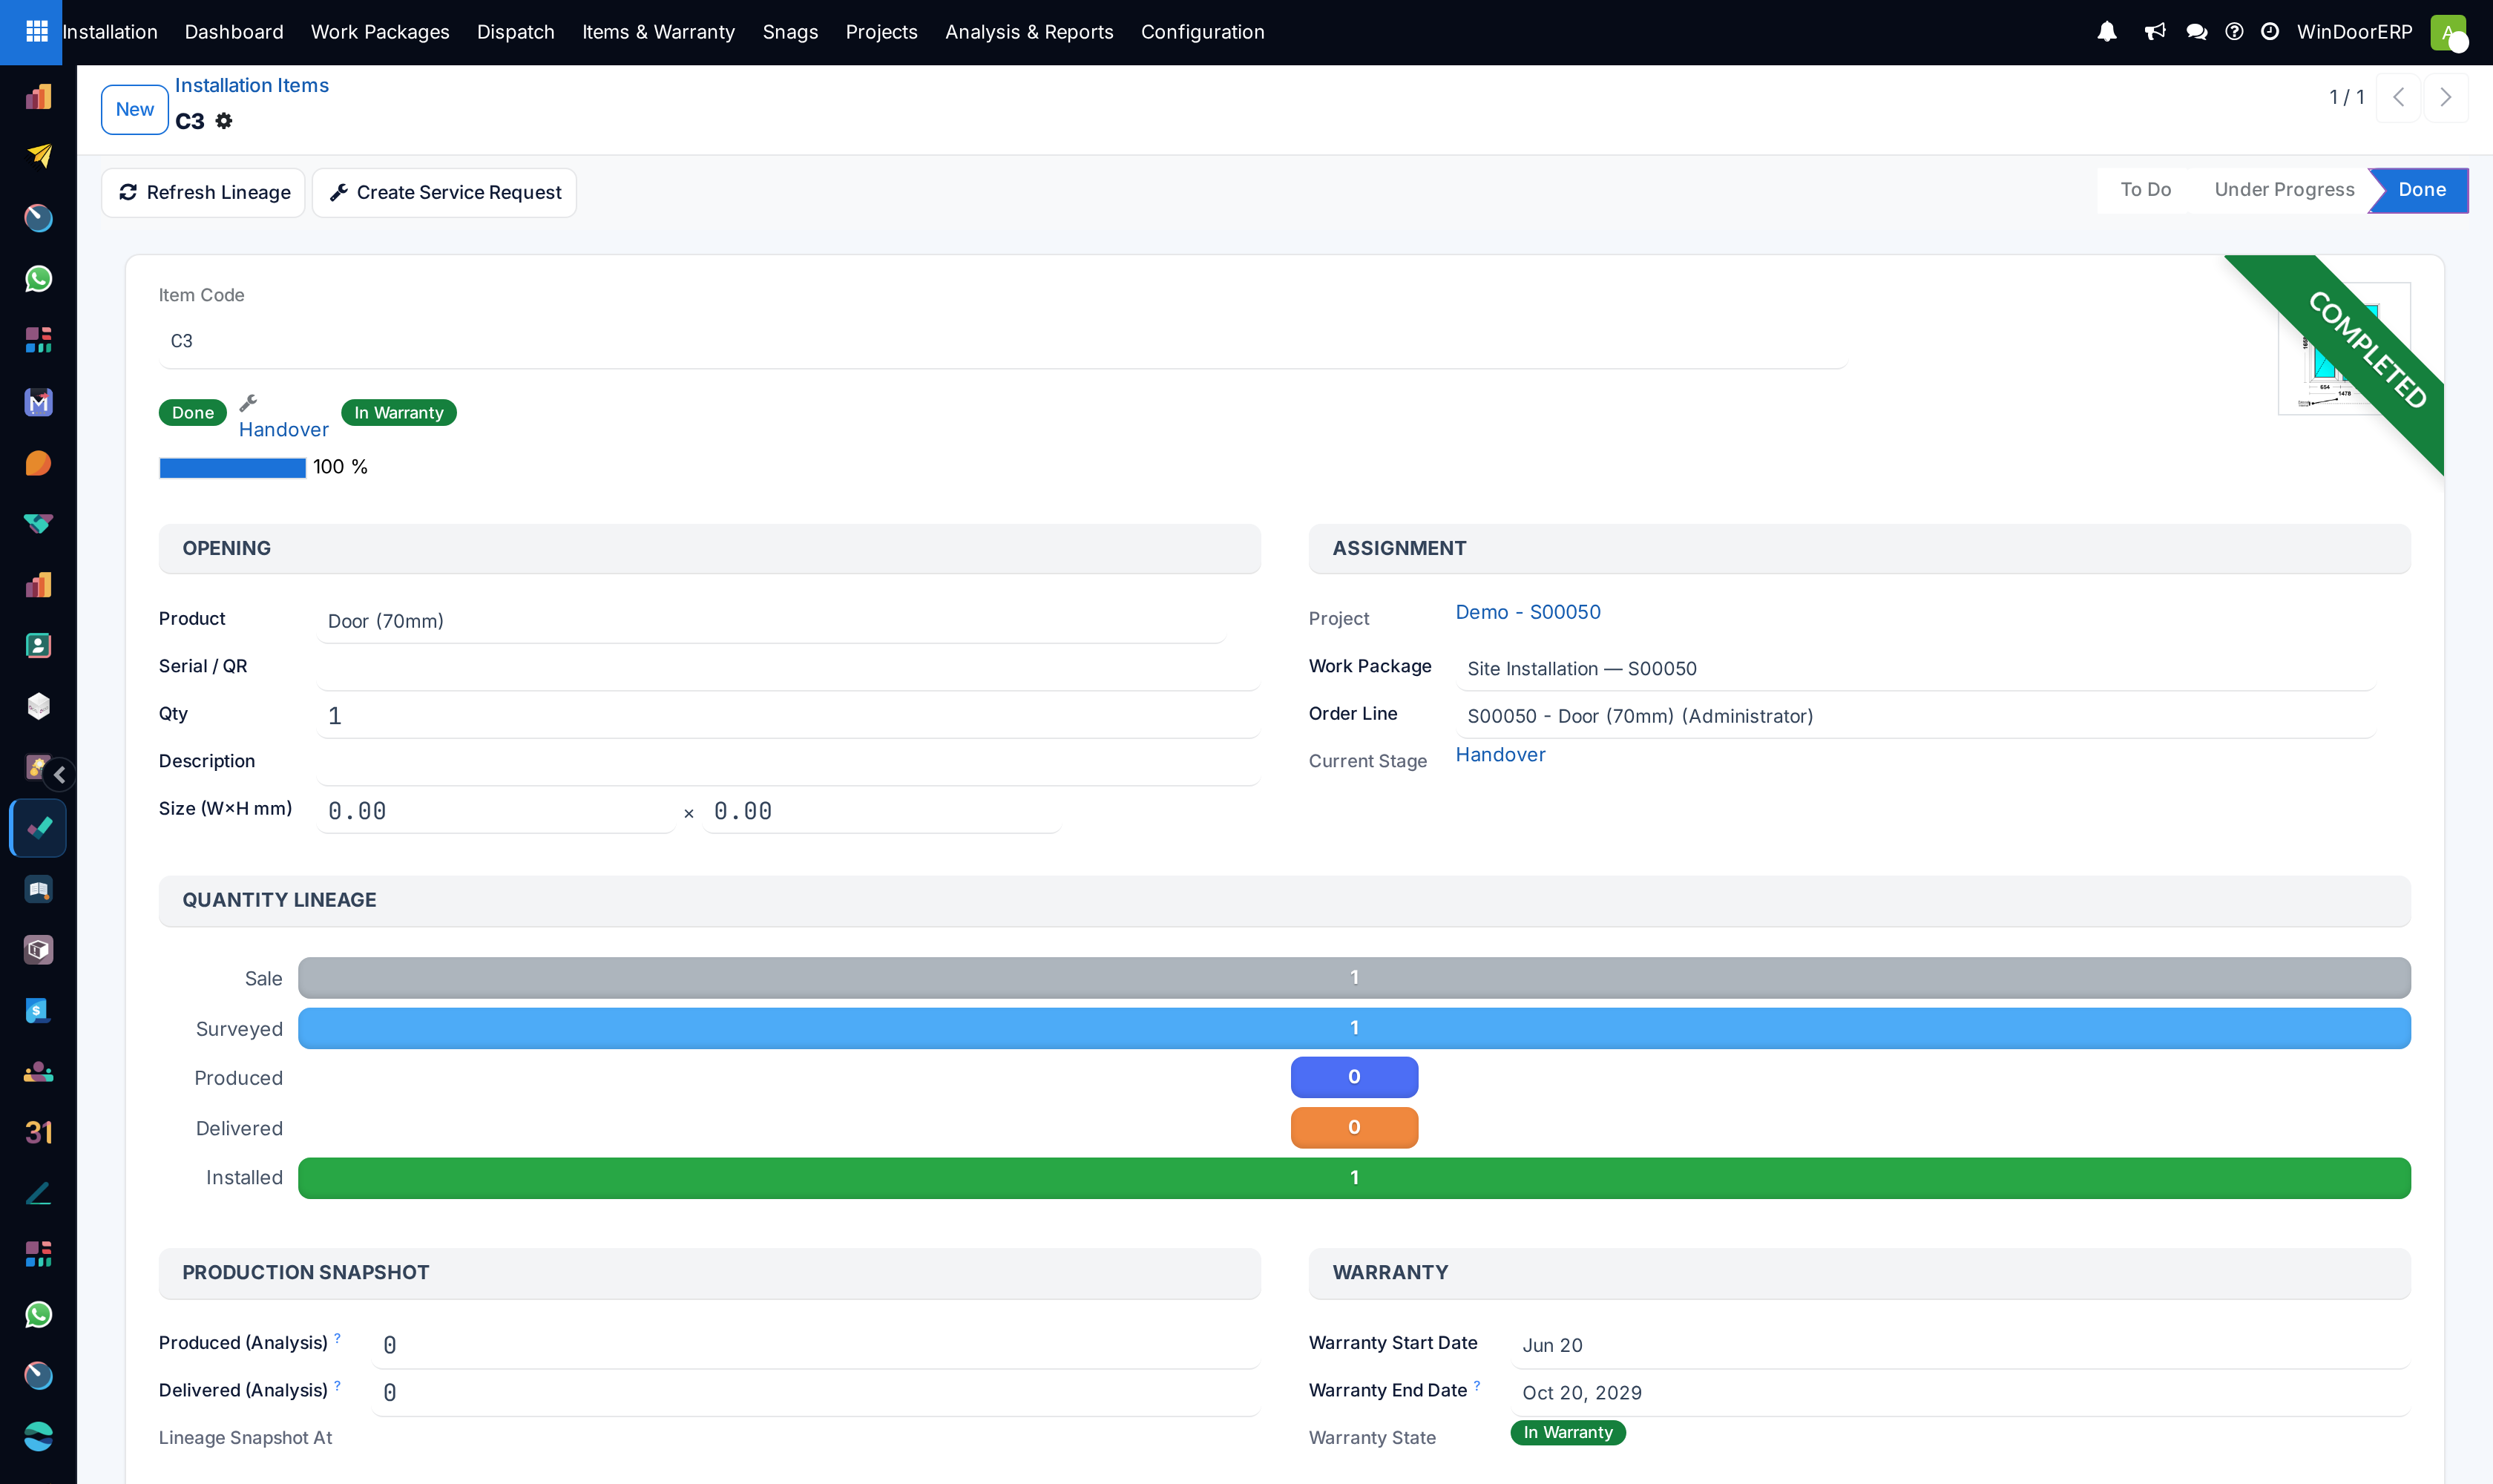
An installation item is one opening — one window or door position on a job — with its own checklist of actions, its own serial, and its own warranty clock. The Installation Items screen is the register of every opening across every site; Warranty is the same register filtered to openings whose warranty is running.
Before you start
- Items are normally created for you: confirming a sales order with Installation Tracking on generates one item per physical order line, on a work package named after the order.
- To follow one specific job rather than the whole register, open the work package instead — its grid is the same items in tickable form.
Steps
-
01
Open Installation › Items & Warranty › Installation Items — a kanban grouped by work package, each card carrying its drawing, progress ring and state badge.
-
02
Open an item to read its Actions tab: one row per required action, who ticked it and when, with its photo.
-
03
Where one line covers several identical windows, press Split into Units to track each unit separately — the children are named
CODE-1,CODE-2… and get their own serials. -
04
Check the Quantity lineage funnel — Sale, Surveyed, Produced, Delivered, Installed — to see where the quantity is stuck before blaming the crew.
-
05
After production or delivery moves, press Refresh Lineage to update the stored analysis figures.
The item, field by field
| Field | What it does |
|---|---|
| Item Code | From the order line's code; hand-created items get an ITEM- sequence instead. |
| Design | The drawing, straight from the order line — what the crew sees on the card and in the portal. |
| Work Package / Project / Order Line | Where the opening belongs. The order line link is what powers the lineage and serial binding. |
| Serial / QR | Bound automatically from the produced units in the factory; only single-quantity leaves get one. The QR on the unit's label deep-links crews and customers to this record. |
| Qty and Split From / Sub-items | A quantity above 1 can be split into per-unit children; the parent becomes a group that averages its children. |
| State | To Do → Under Progress (first action ticked) → Done (no required action left pending). Computed — the statusbar is a display, not a button. |
| Current Stage | The furthest completed action — what the kanban columns group on. |
| Sale / Surveyed / Produced / Delivered / Installed | The lineage. Produced and Delivered are read live from production; the (Analysis) snapshot twins are stored copies that the Analysis pivot measures — they update only when someone presses Refresh Lineage. |
| Warranty Start / End / State | See below. |
When the warranty actually starts
The warranty clock starts the first time the item reaches Done — that is, when its last required action is ticked on site. It does not wait for the handover signature; handover only back-fills any item that was missed.
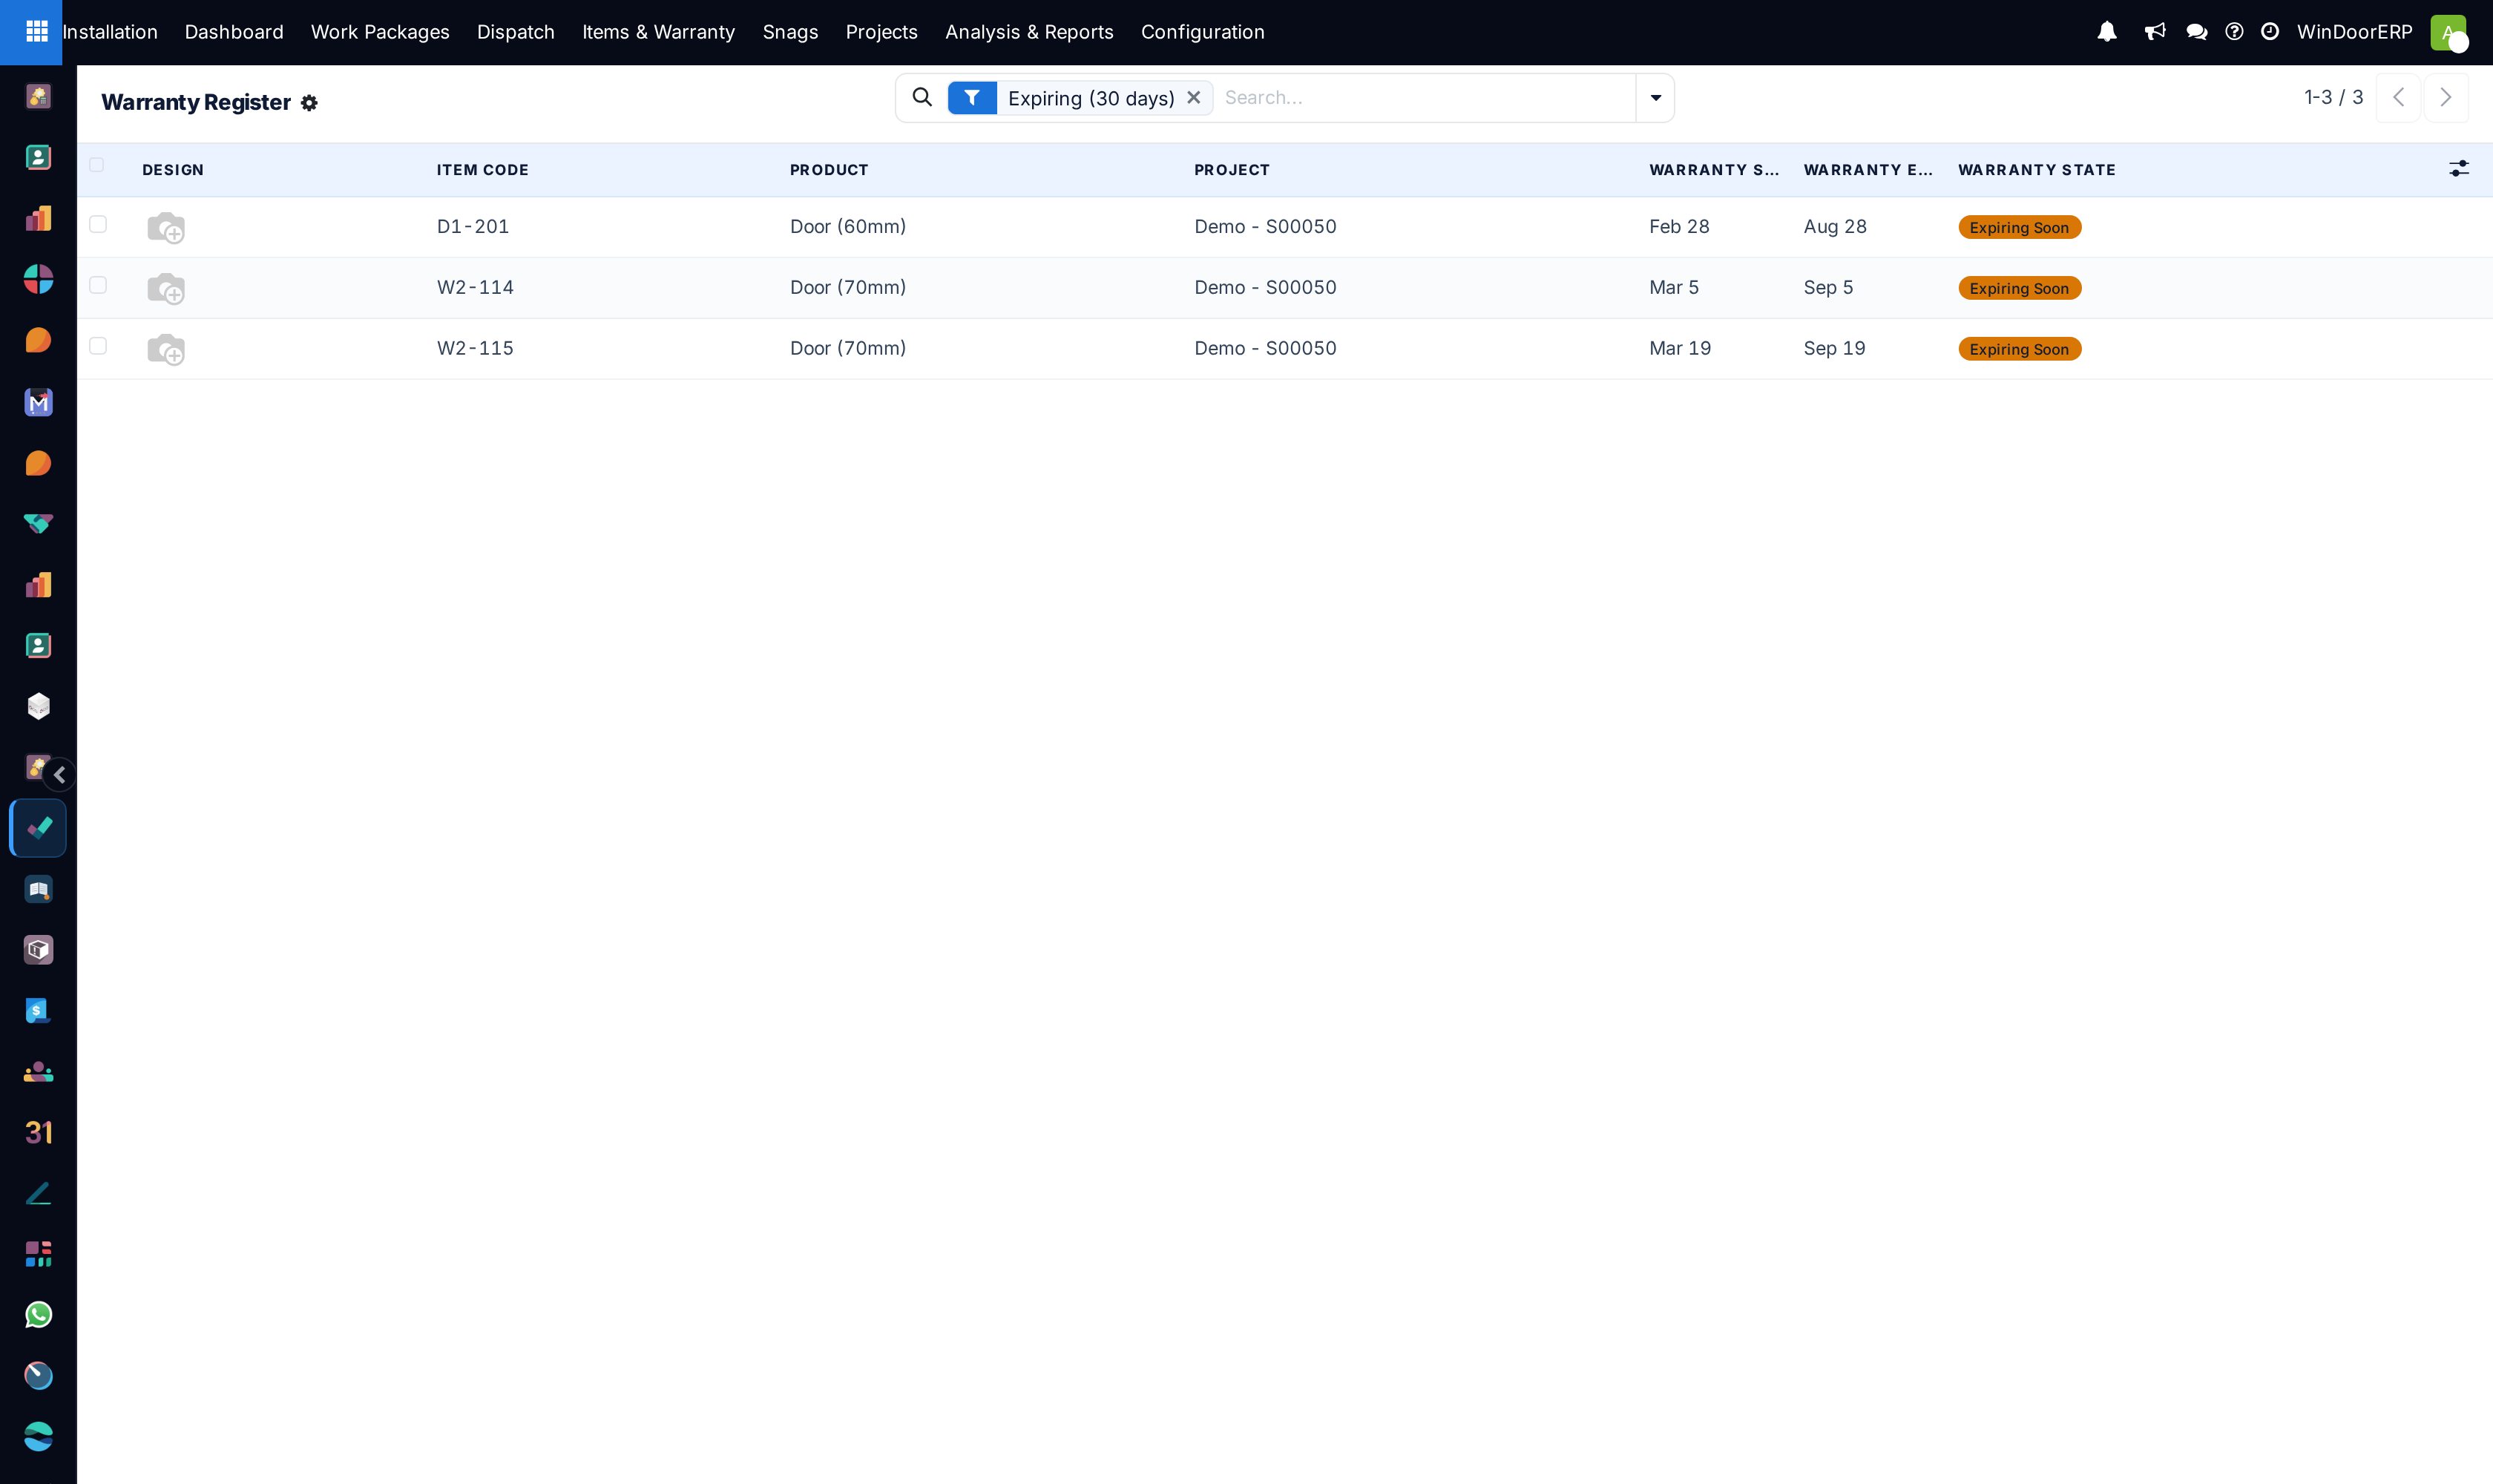
The end date is the start plus the Warranty (months) set on the product template, and it stays editable per item; a product with no warranty months gives the item no end date at all. The state reads In Warranty, then Expiring in the last 30 days, then Expired.
The Warranty menu (shown on screen as the Warranty Register) lists only items whose clock has started — and it opens with the Expiring (30 days) filter already applied, so a healthy register looks empty until you clear the chip.
What the customer gets
There is no per-item certificate PDF. The warranty documents are the Handover Pack — the per-job PDF listing every opening with its completed actions and warranty end — and the portal warranty passport, a per-opening page showing warranty status, dates and the full lifecycle timeline, which is where the unit's QR label lands the customer after handover.
When a warranty call comes in years later, Create Service Request on the item raises an After-Sales service order pre-filled with the product, the serial and the warranty state.
Troubleshooting
| Message or symptom | Cause and fix |
|---|---|
| "Only an item with quantity > 1 can be split." | Split exists to break a multi-unit line into units; a single unit has nothing to split. |
| "A sub-item cannot be split again." | Splitting stops at one level — the children are already single units. |
| "The After-Sales module is not installed." | Create Service Request needs the After-Sales app on this database. |
| Warranty list looks empty | Two causes: the default Expiring (30 days) filter, and items whose product has no warranty months — those never get an end date, so set the months on the product template. |
| Analysis shows Produced and Delivered as zero | The pivot measures the stored snapshots, not the live figures. Press Refresh Lineage on the items (the live funnel on each form is always current). |
| An item has no serial | Serials bind only to quantity-1 leaves, from produced units in the factory. Split the group, or check the unit was actually produced. |
Common mistakes
- Tracking a ten-window line as one item — split it, or the tenth window's snag has no unit to live on.
- Reading the warranty register without clearing the default filter and concluding nothing is under warranty.
- Expecting the warranty to start at handover — it starts when the last required action is ticked, which on a slow-closing job can be weeks earlier.
Was this article helpful?
Thanks — your feedback helps.
Running a window or door factory?
Ask for a demo