Create storage locations
What this does
Divides a warehouse into the places people actually walk to — profile racks, glass stillages, the hardware store, the finished-goods bay — so "where is it?" has an answer.
Before you start
- Enable Storage Locations in Inventory › Configuration › Settings, under Warehouses, and save.
- It is normally used together with Multi-Step Routes, which controls how goods travel between those locations.
Steps
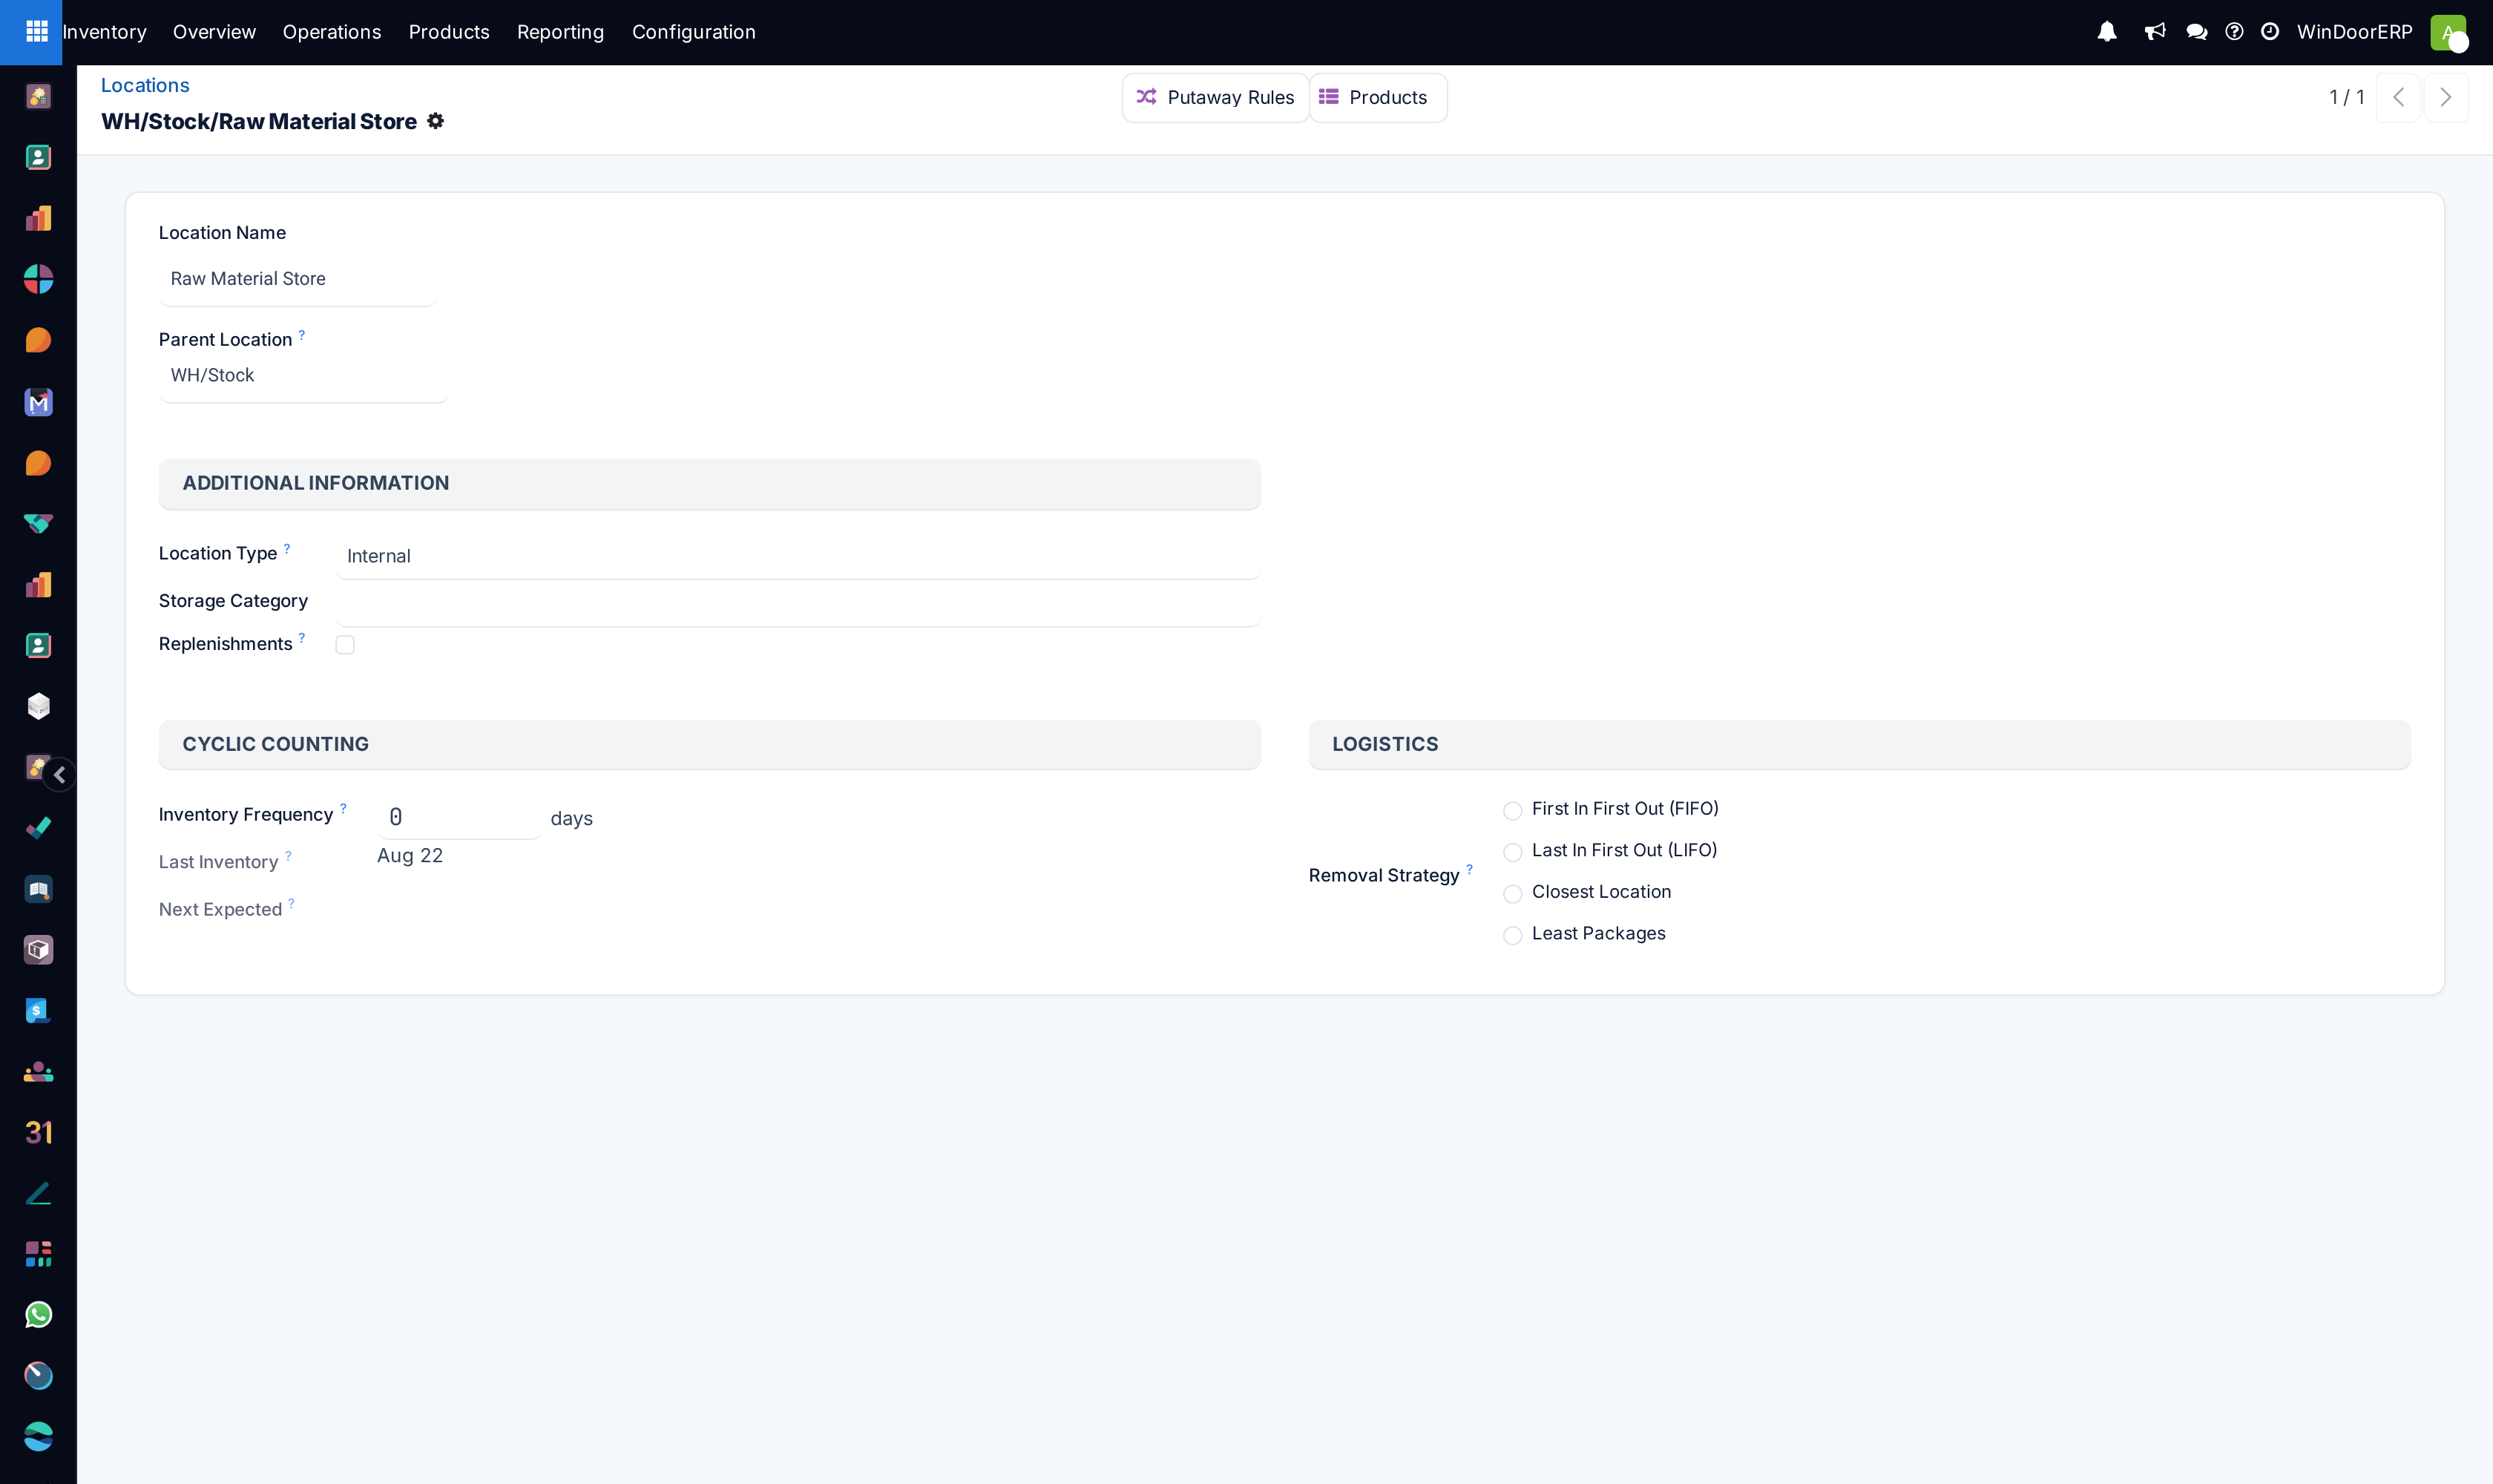
A location is a specific space within a warehouse. This can be a shelf, room, aisle, etc.
-
01
Go to Inventory › Configuration › Locations and click New.
-
02
Enter a Location Name a picker would recognise.
-
03
Set the Parent Location — the area it sits inside, which builds the path
WH/Stock/Zone A/Rack 3. -
04
Choose the Location Type; for real storage that is Internal.
-
05
Add a Barcode if the floor uses scanners.
-
06
Tick Replenishments if purchased or manufactured goods should be delivered straight here.
-
07
Save.
Configuration
To create specific storage locations, enable the Storage Locations feature by going to Inventory app › Configuration › Settings. In the Warehouses section, tick the Storage Locations checkbox. Then, click Save.
Note
Typically, the Storage Locations feature is used with Multi-Step Routes, which controls how products move between locations.
Create new location
After enabling Storage Locations, go to Inventory app › Configuration › Locations.
On this page, click New. The new location form can then be configured as follows:
- Location Name: recognizable name of the location.
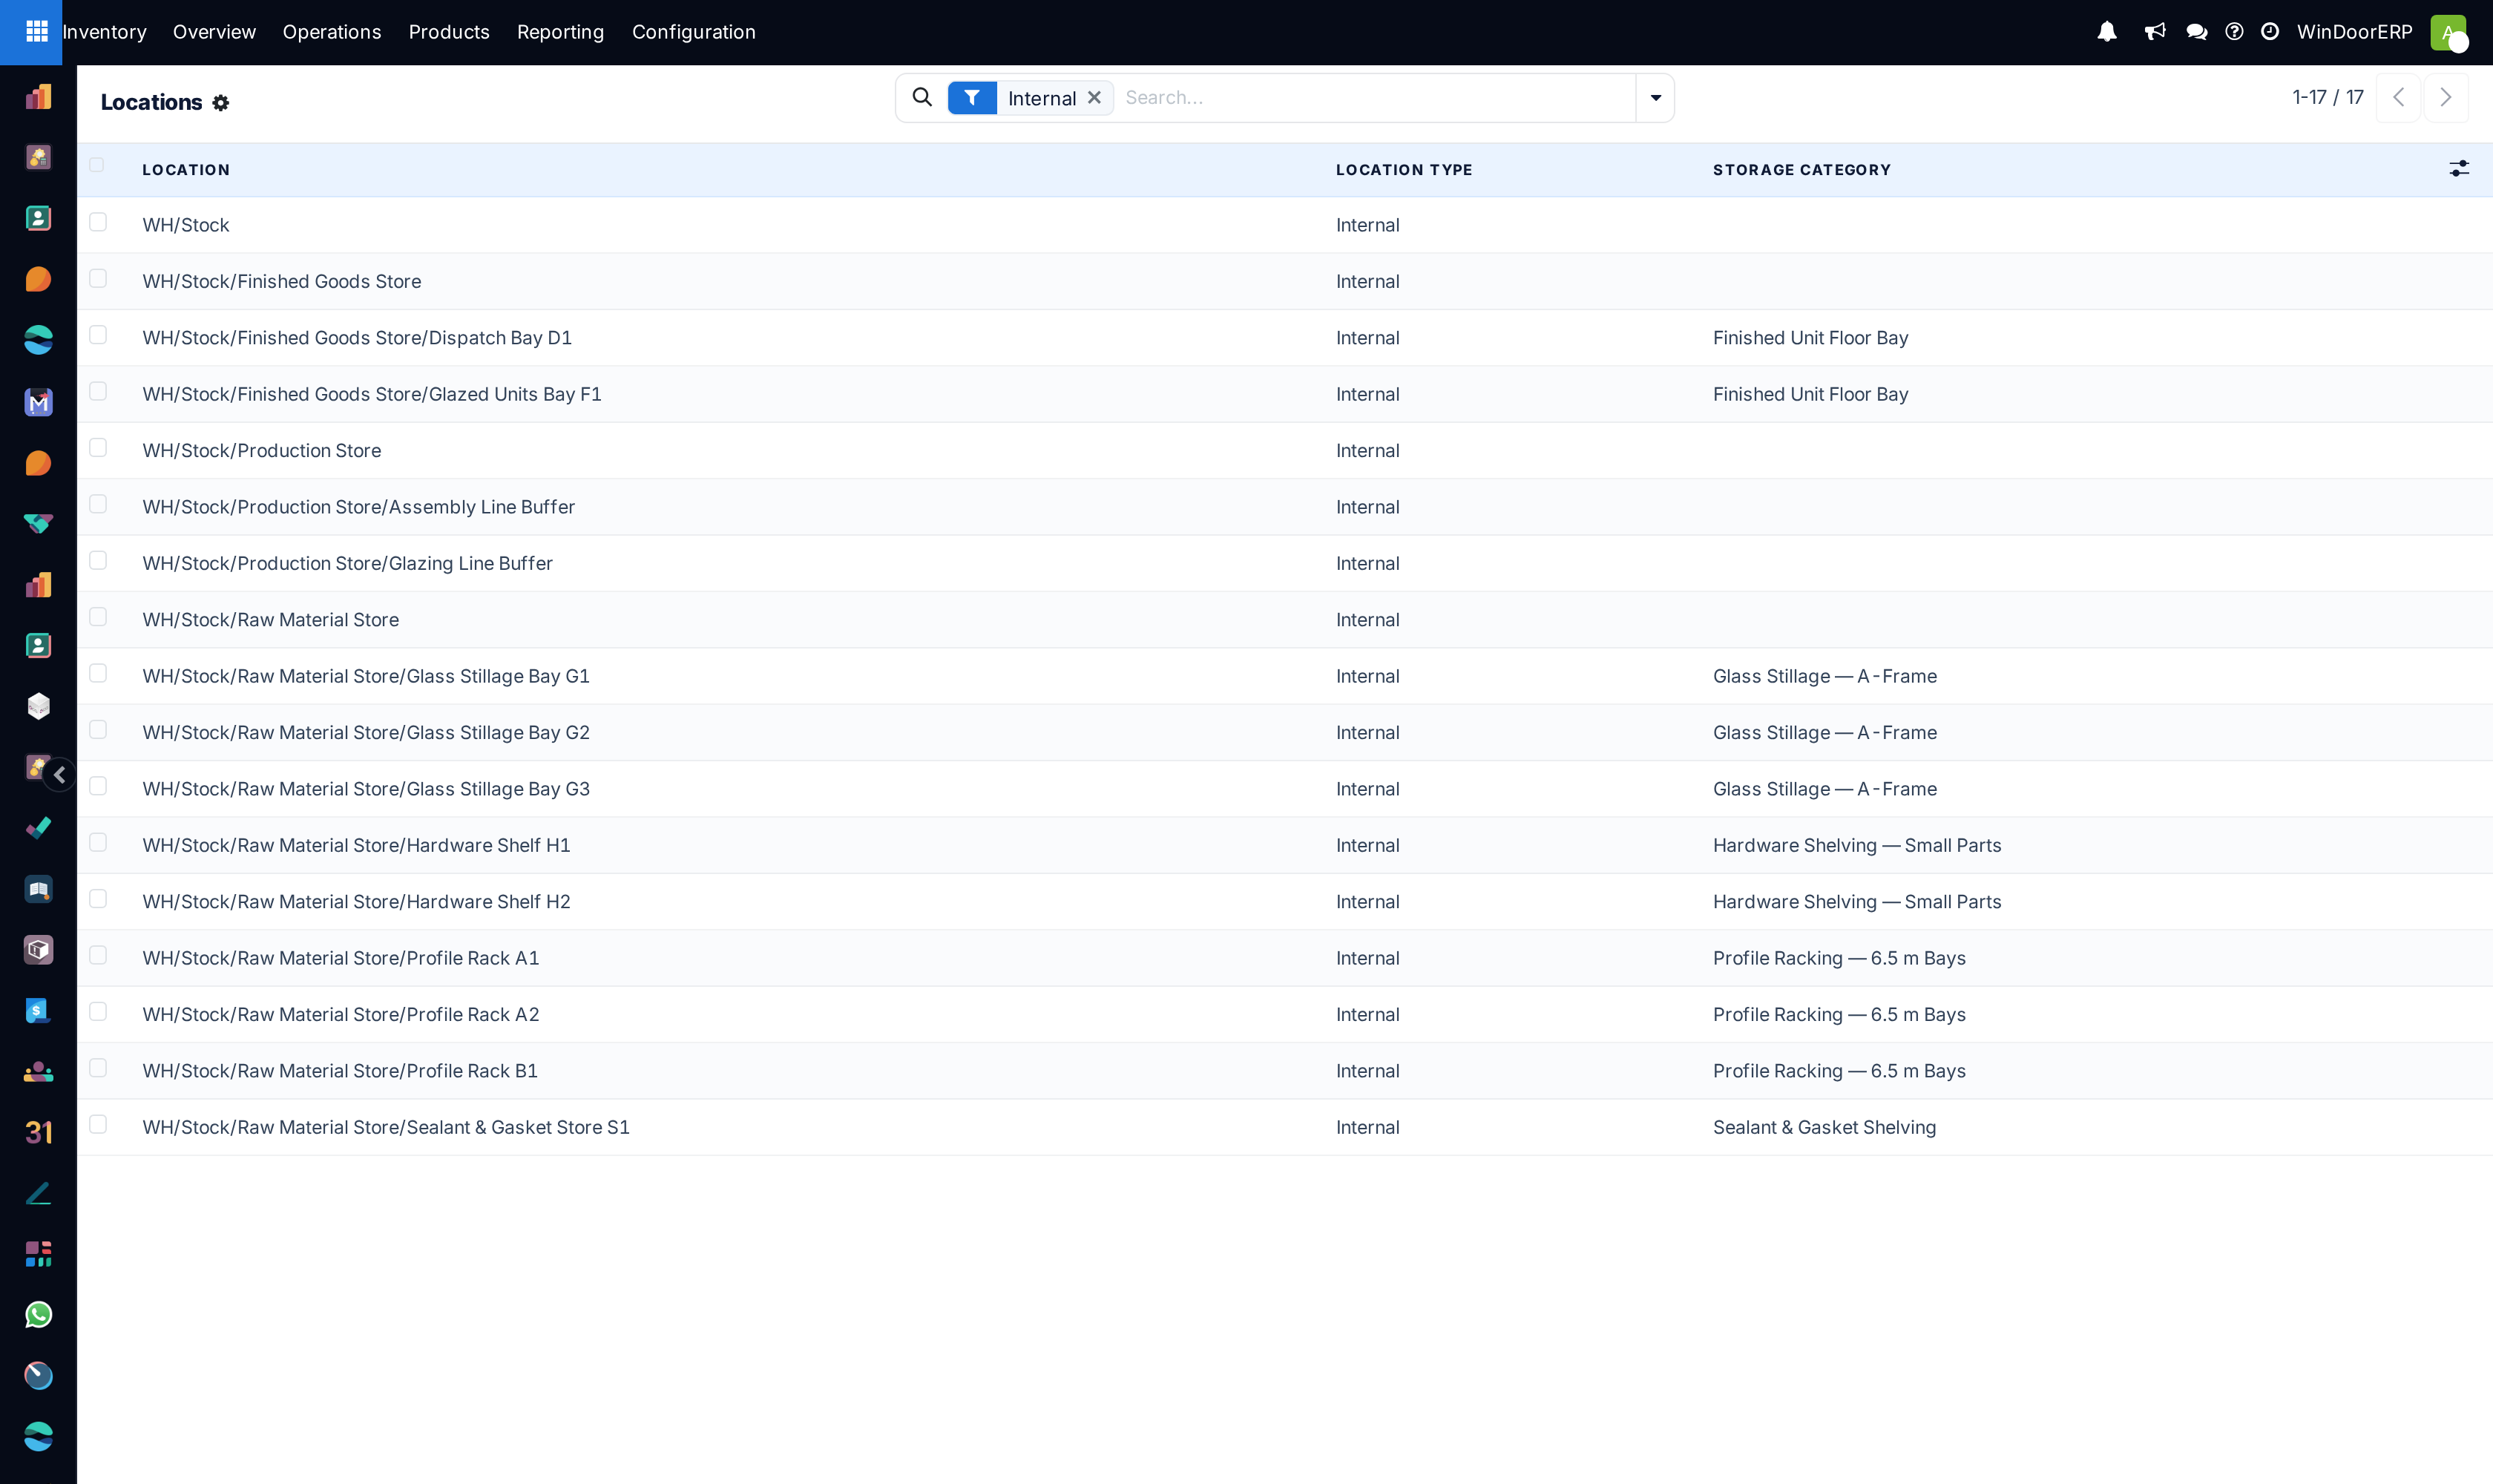
- Parent Location: the location within which the new location exists. After the location is created, it is listed on the Locations page using a location hierarchy, to describe how a specific location fits within larger areas of the warehouse.
Example
In
WH/Stock/Zone A/Refrigerator 1,Refrigerator 1is the location name,Zone Ais the parent location, and everything before it is the path showing where this spot is within the warehouse.
Additional Information section
In addition to the required fields above, configure the following location fields to ensure the location serves its intended purpose in the database:
- Location Type: from the drop-down menu, choose Vendor, Virtual, Internal, Customer, Inventory Loss, Production, or Transit to categorize the location. For details on each location type, refer to the Location Types section.
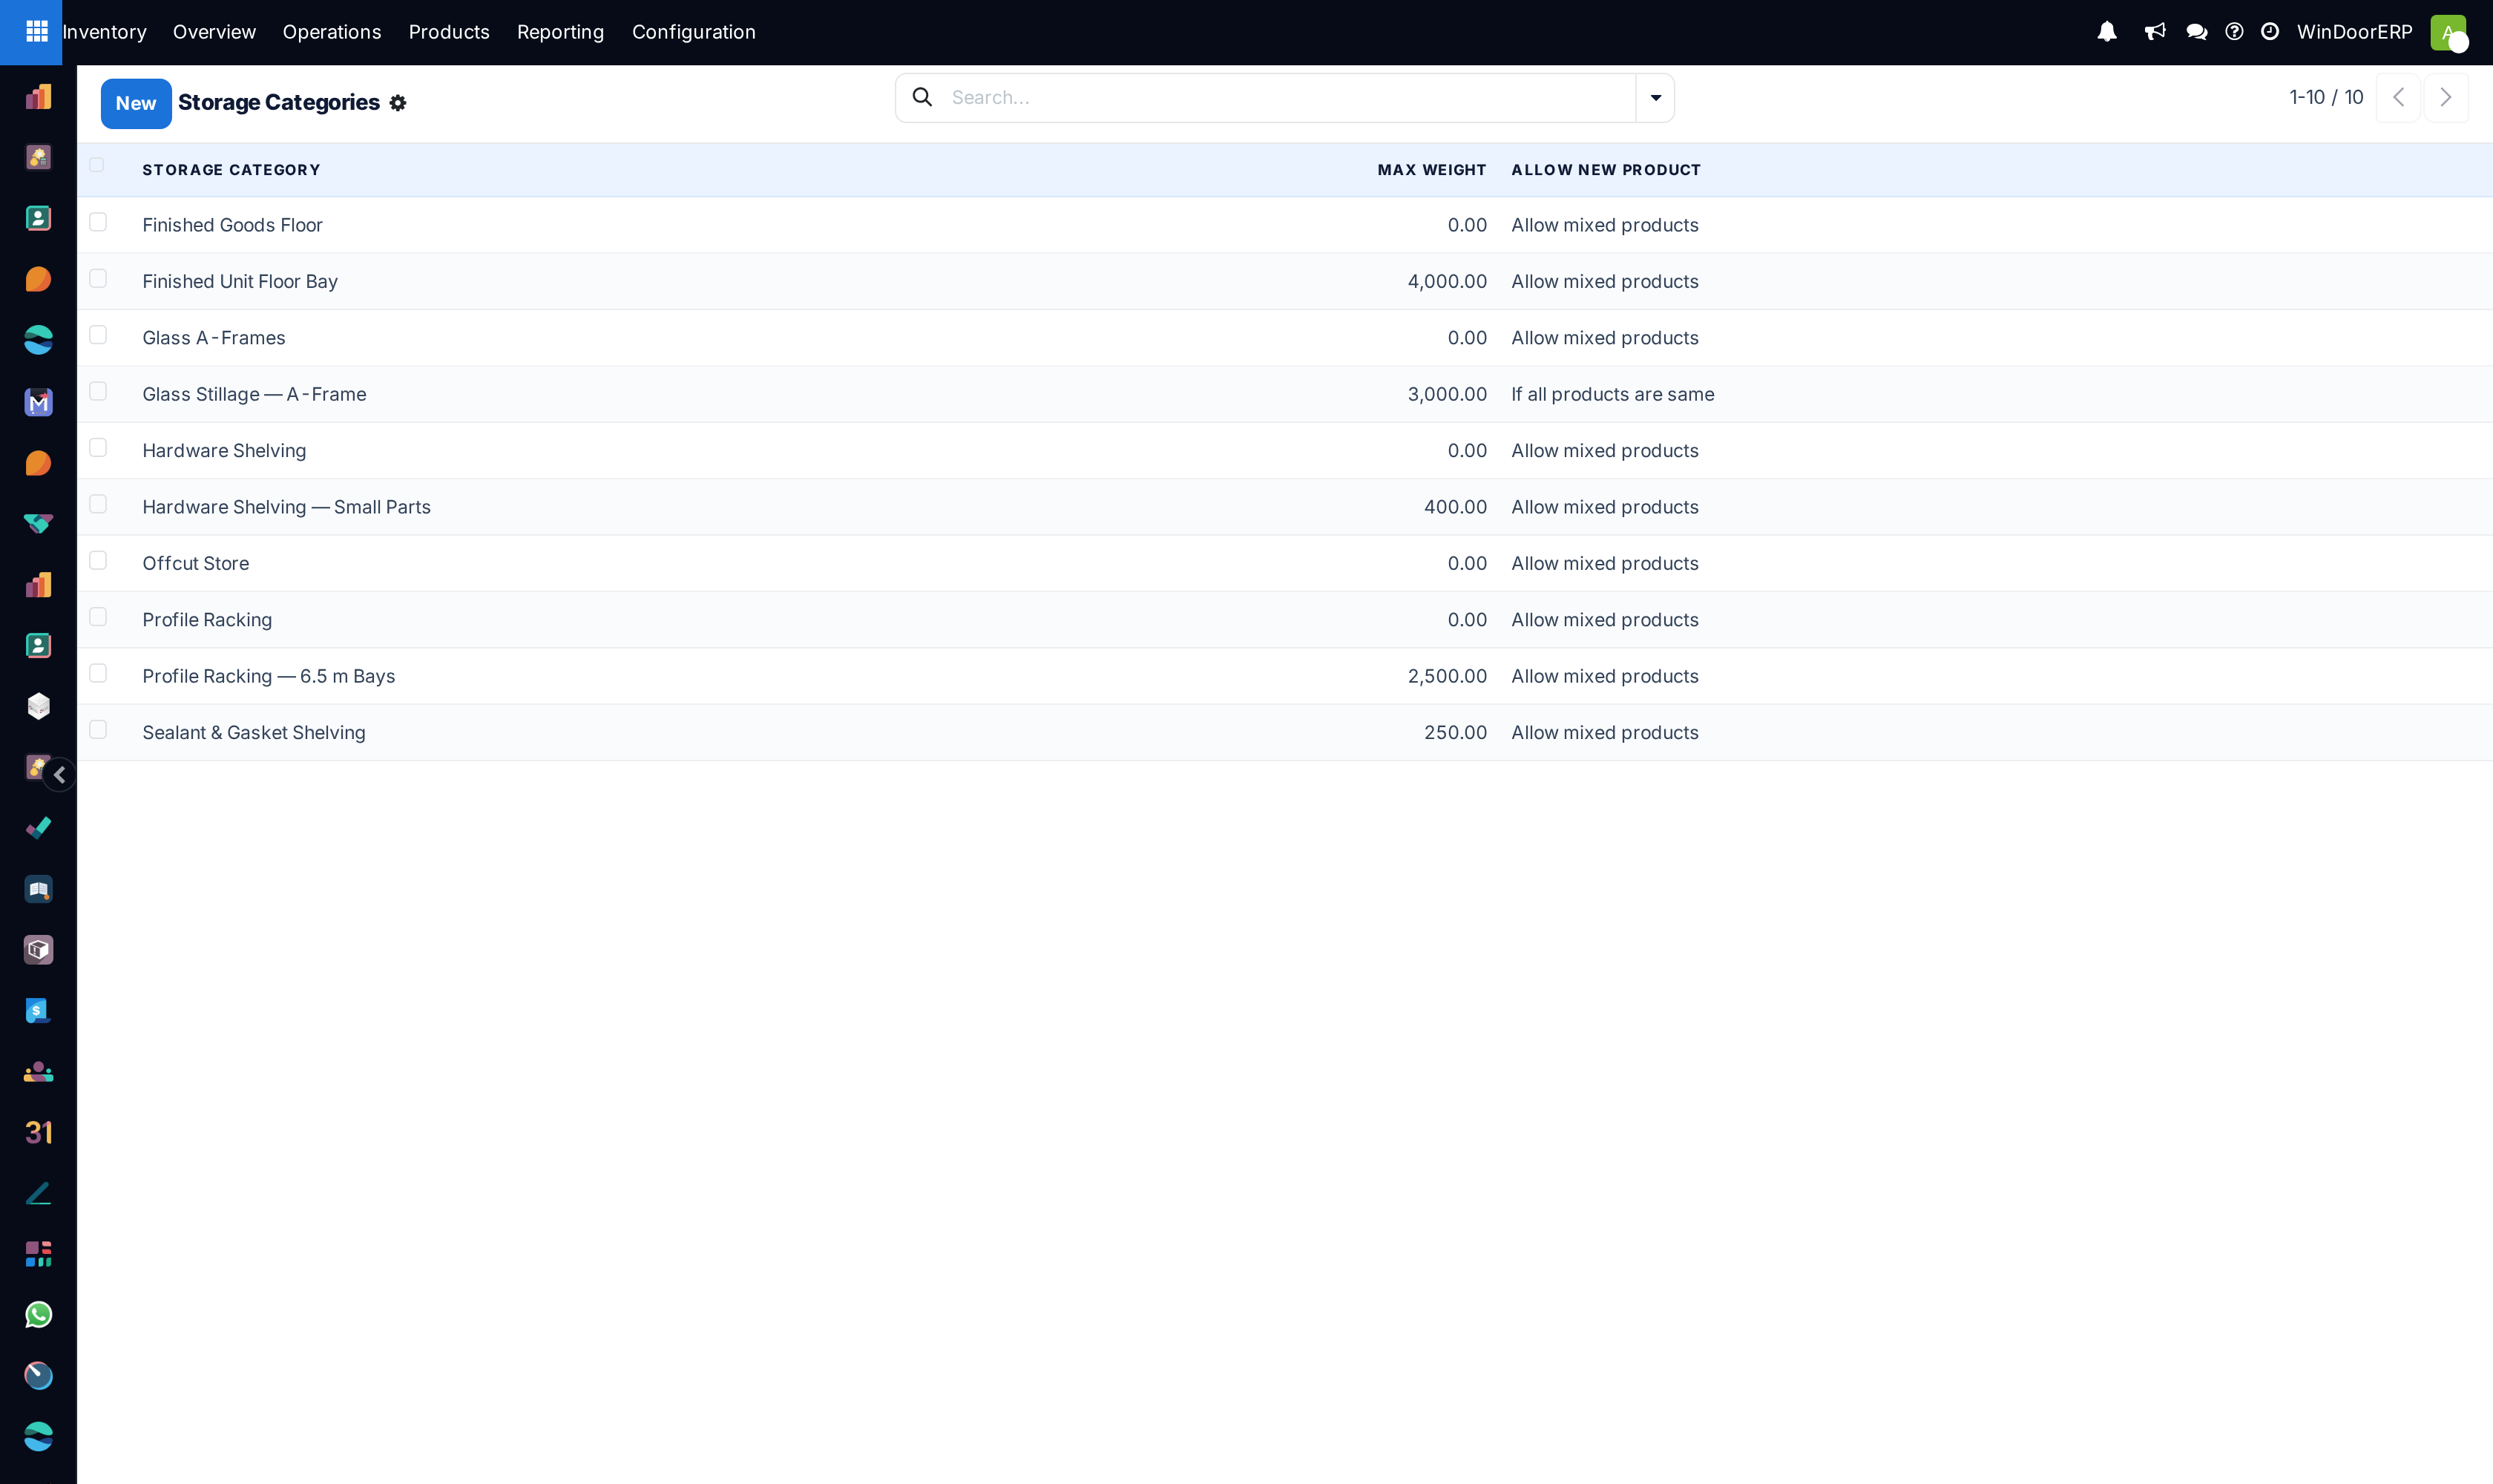
- Storage Category: only available with the Storage Categories feature enabled in Inventory app › Configuration › Settings.
- Company: the company the location belongs to.
- Barcode: used with the Barcode app, enter the barcode to identify actions at this location when scanned.
- Replenishments: used for configuring routes, tick this checkbox to set the location as a destination for receiving products from Buy, Manufacture, or other procurement routes, ensuring products are correctly supplied to the warehouse.
In the Cyclic Counting section, change the value in the Inventory Frequency field from the default 0, if necessary.
When different than 0, the inventory count dates for products stored at this location are automatically set at the defined frequency.
In the Logistics section, in the Removal Strategy field, click the drop-down menu and select the removal strategy for how items should be removed from this location.
Cyclic Counting section
To schedule regular inventory counts at this location, set the Inventory Frequency field to the desired interval. By default, it is set to 0 (no scheduled counts).
For example, setting this field to 30 schedules a count every thirty days. For more specifics on setting up and using this feature, refer to the Cycle Counts documentation.
The Last Inventory field displays the date the last inventory count at this location occurred. When scheduled inventory counts are enabled, the Next Expected field displays the date of the next inventory count.
Example
With inventory counts scheduled to occur every 30 days, and the Last Inventory count occurring on November 13, the Next Expected is December 13.
Logistics section
In the Logistics section of the locations form, optionally select a Removal Strategy to determine the order and priority of how products are picked from inventory. The options are: First In First Out (FIFO), Last In First Out (LIFO), Closest Location, Least Packages, and First Expiry First Out (FEFO).
Current stock at location
To view the current stock at a single location, go to Inventory app › Configuration › Locations, and select the desired location.
Next, click the Products smart button to get a list of all products at the location.
Example
A list of current stock at Shelf 2 consists of 90 cable management boxes.
Counting and picking rules per location
Two fields further down decide how the location behaves:
- Inventory Frequency (Cyclic Counting) — days
between scheduled counts here.
0means no schedule;30means every thirty days, and Next Expected is filled in from the last count. - Removal Strategy (Logistics) — which units leave first: FIFO, LIFO, FEFO, closest location or least packages.
See what is in a location
Open the location and click the Products smart button: every item stored there, with quantities.
Common mistakes
- Naming locations after what is in them today. Racks outlive products; name the place, not the contents.
- A tree so deep nobody maintains it. Two or three levels is usually the whole answer.
- Enabling storage locations on a live database mid-week without telling the floor where to put things.
Was this article helpful?
Thanks — your feedback helps.
Running a window or door factory?
Ask for a demo