Dispatch Management System (Fleet Load Building, Dock Scheduling & Map Routing)
What this does
The Dispatch Management System in WindoorERP optimizes delivery logistics for architectural fenestration, aluminium window/door frames, curtain wall units, and heavy double-glazed (DGU) glass packs. It enables transport coordinators to plan vehicle load capacity (weight & volume), schedule warehouse loading dock slots, group delivery orders into route-optimized batches or waves, and generate interactive turn-by-turn map routes for drivers.
Before you start
- Install the Fleet application and ensure Inventory is configured.
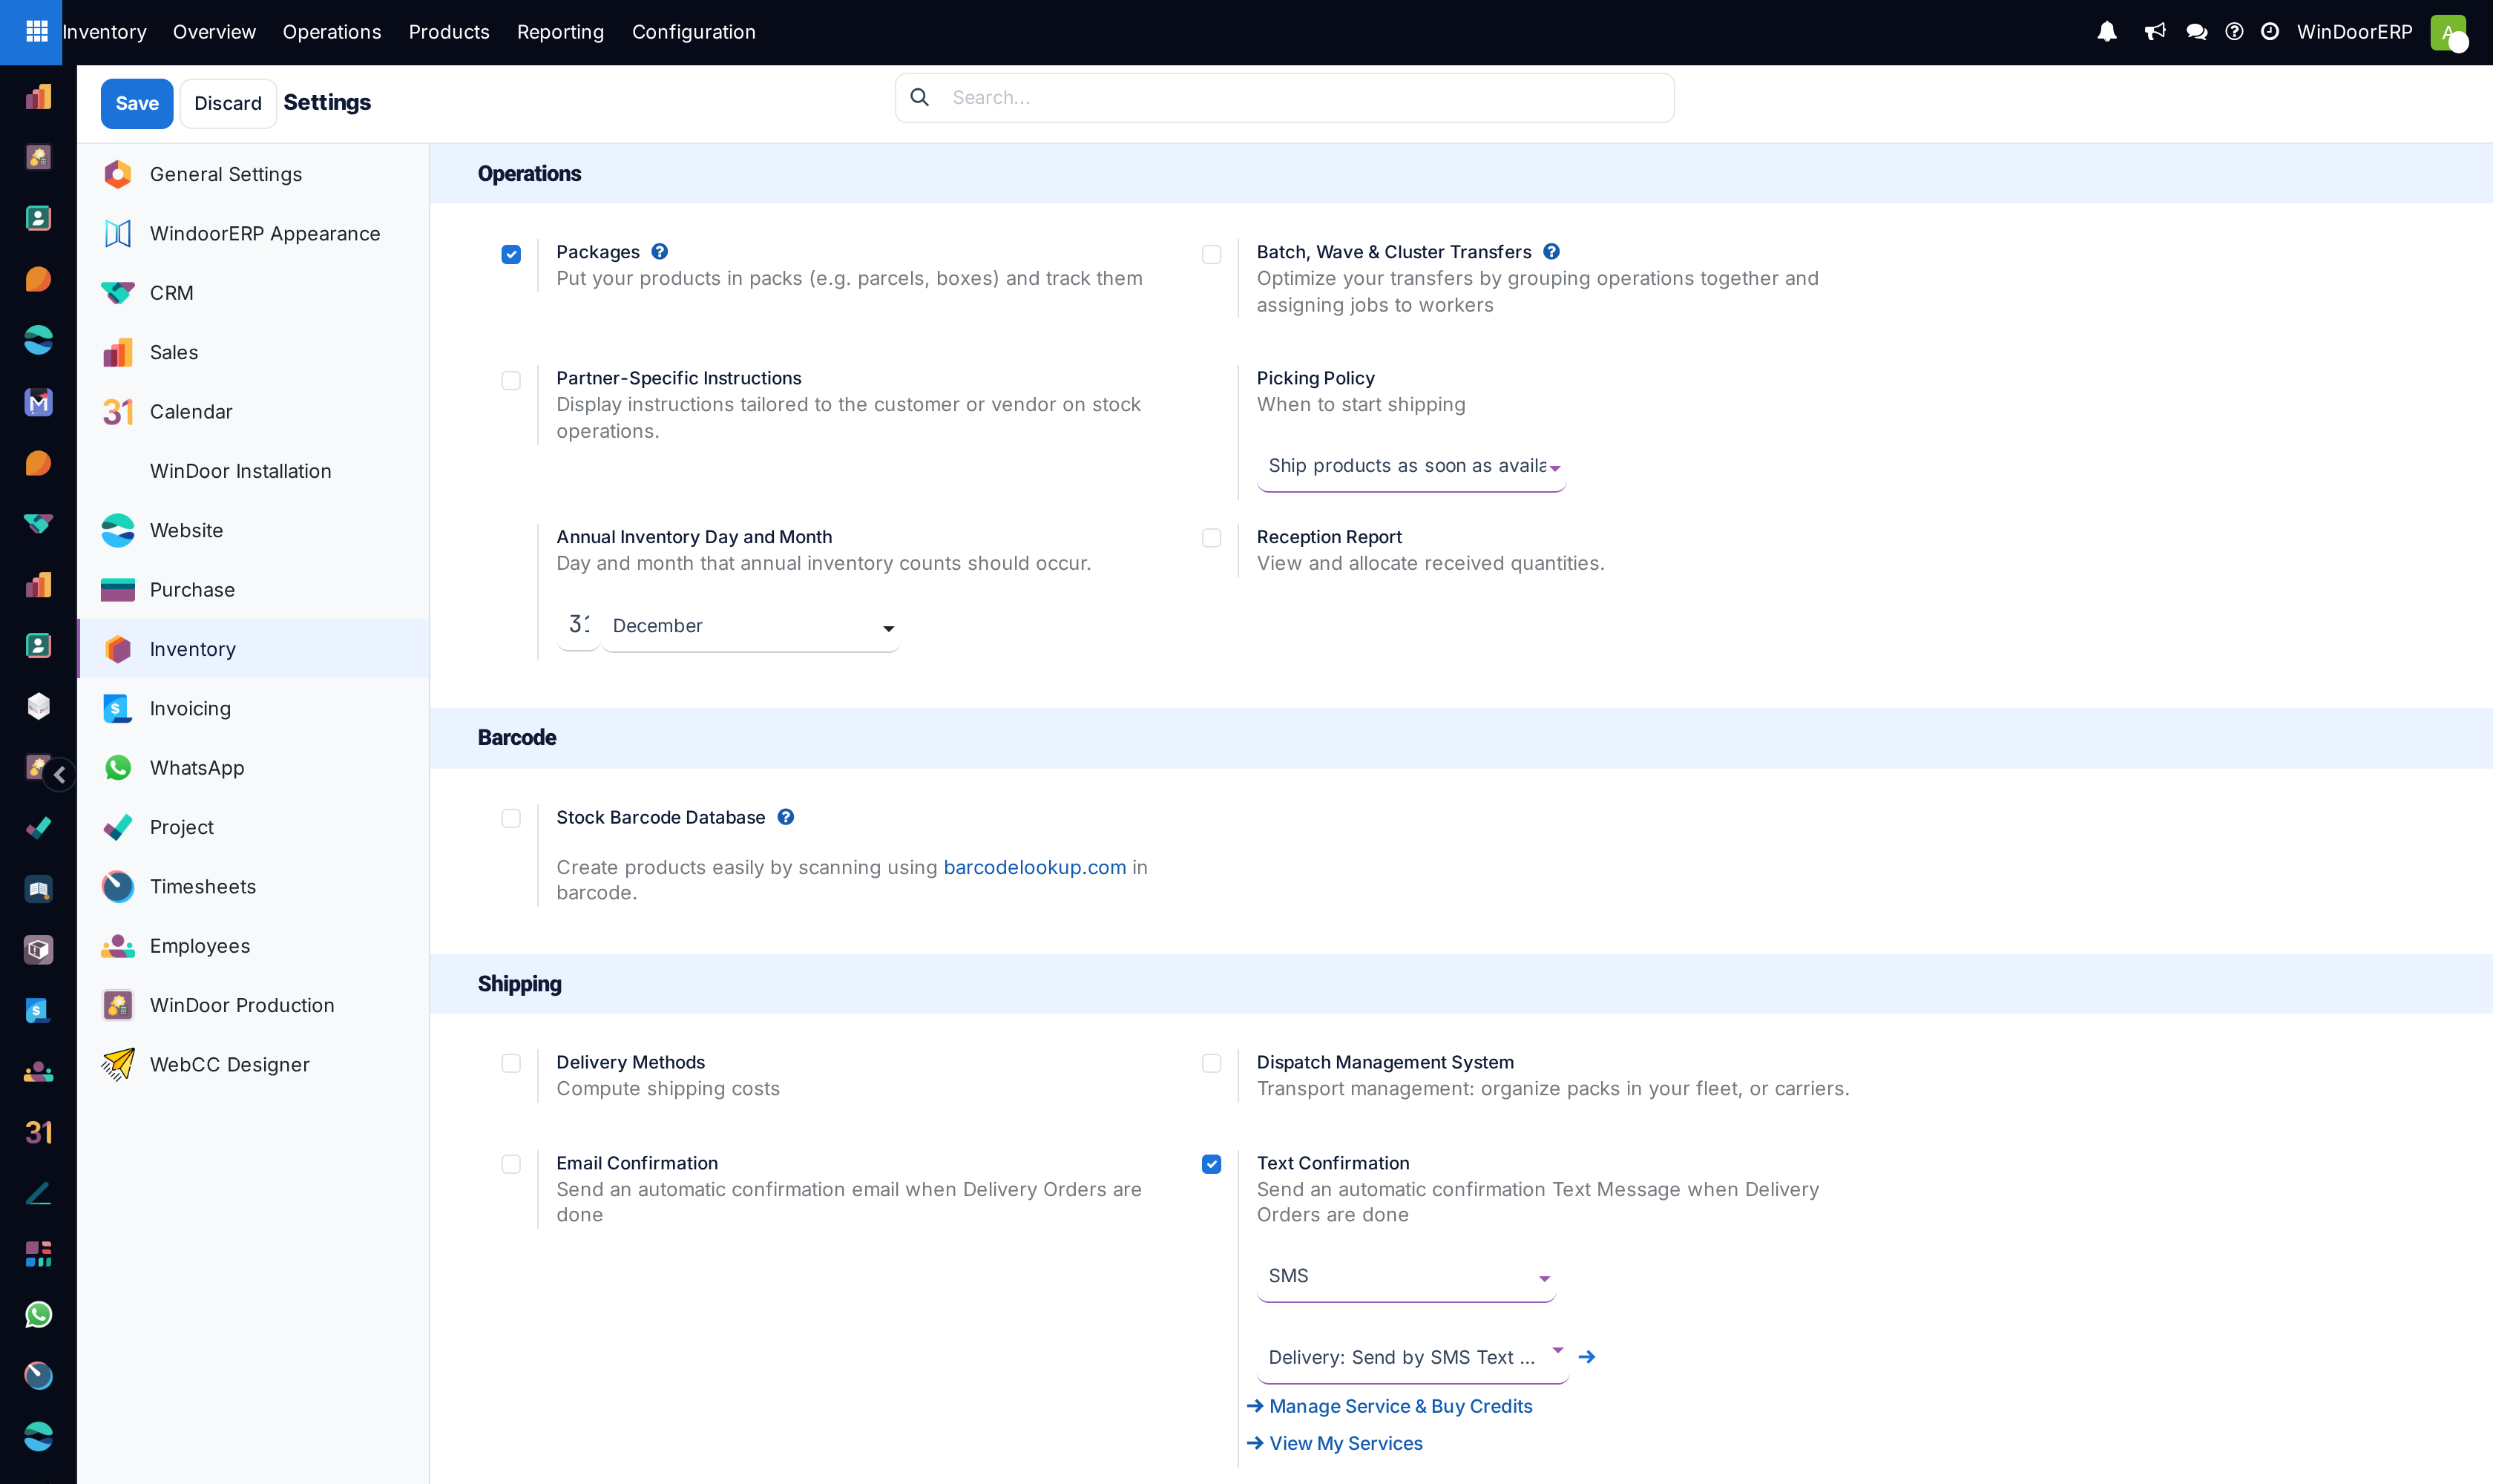
- Enable Batch, Wave & Cluster Transfers, Storage Locations, and Dispatch Management System in Inventory › Configuration › Settings.
- Ensure all fabricated window assemblies, glass units, and profile extrusions have accurate Weight (kg) and Volume (m³) entered on their Inventory tab.
- Obtain a Mapbox API Access Token (or configure default Google Maps integration) for map route rendering.
1. System Configuration & Fleet Capacity Setup
-
01
Enable Dispatch Management: In Inventory › Configuration › Settings, check Batch, Wave & Cluster Transfers, Delivery Methods, and Dispatch Management System, then click Save.
-
02
Configure Map Routing Token: In General Settings › Integrations, locate Map Routes and paste your Mapbox API token into the Token field.
-
03
Define Vehicle Categories & Capacity Limits: Go to Fleet › Configuration › Categories. Create categories for your logistics fleet (e.g. Glass A-Frame Truck (10-Ton), Curtain Wall Flatbed Crane, Fast Site Service Van) and specify the Max Weight (kg) and Max Volume (m³).
-
04
Assign Vehicle Models: In Fleet › Configuration › Models, link your specific vehicles (e.g. Mercedes Actros 2540, Isuzu NPR Glass Carrier) to their appropriate vehicle category to inherit weight and volume limits.
-
05
Set Up Delivery Carriers: In Inventory › Configuration › Delivery Methods, create in-house carrier records corresponding to specific fleet vehicles (e.g.
Truck 1-GLS-001) and set the provider to Fixed Price or Based on Rules. -
06
Create Loading Dock Locations: In Inventory › Configuration › Locations, create dedicated loading bay locations (e.g.
WH/Dock 1 - Glass Cranes,WH/Dock 2 - Profile Loading Bay). -
07
Enable Docks on Operation Types: In Inventory › Configuration › Operation Types, open Delivery Orders, check Dispatch Management, and select the permitted Dock Locations.
2. Load Building & Batch Dispatching
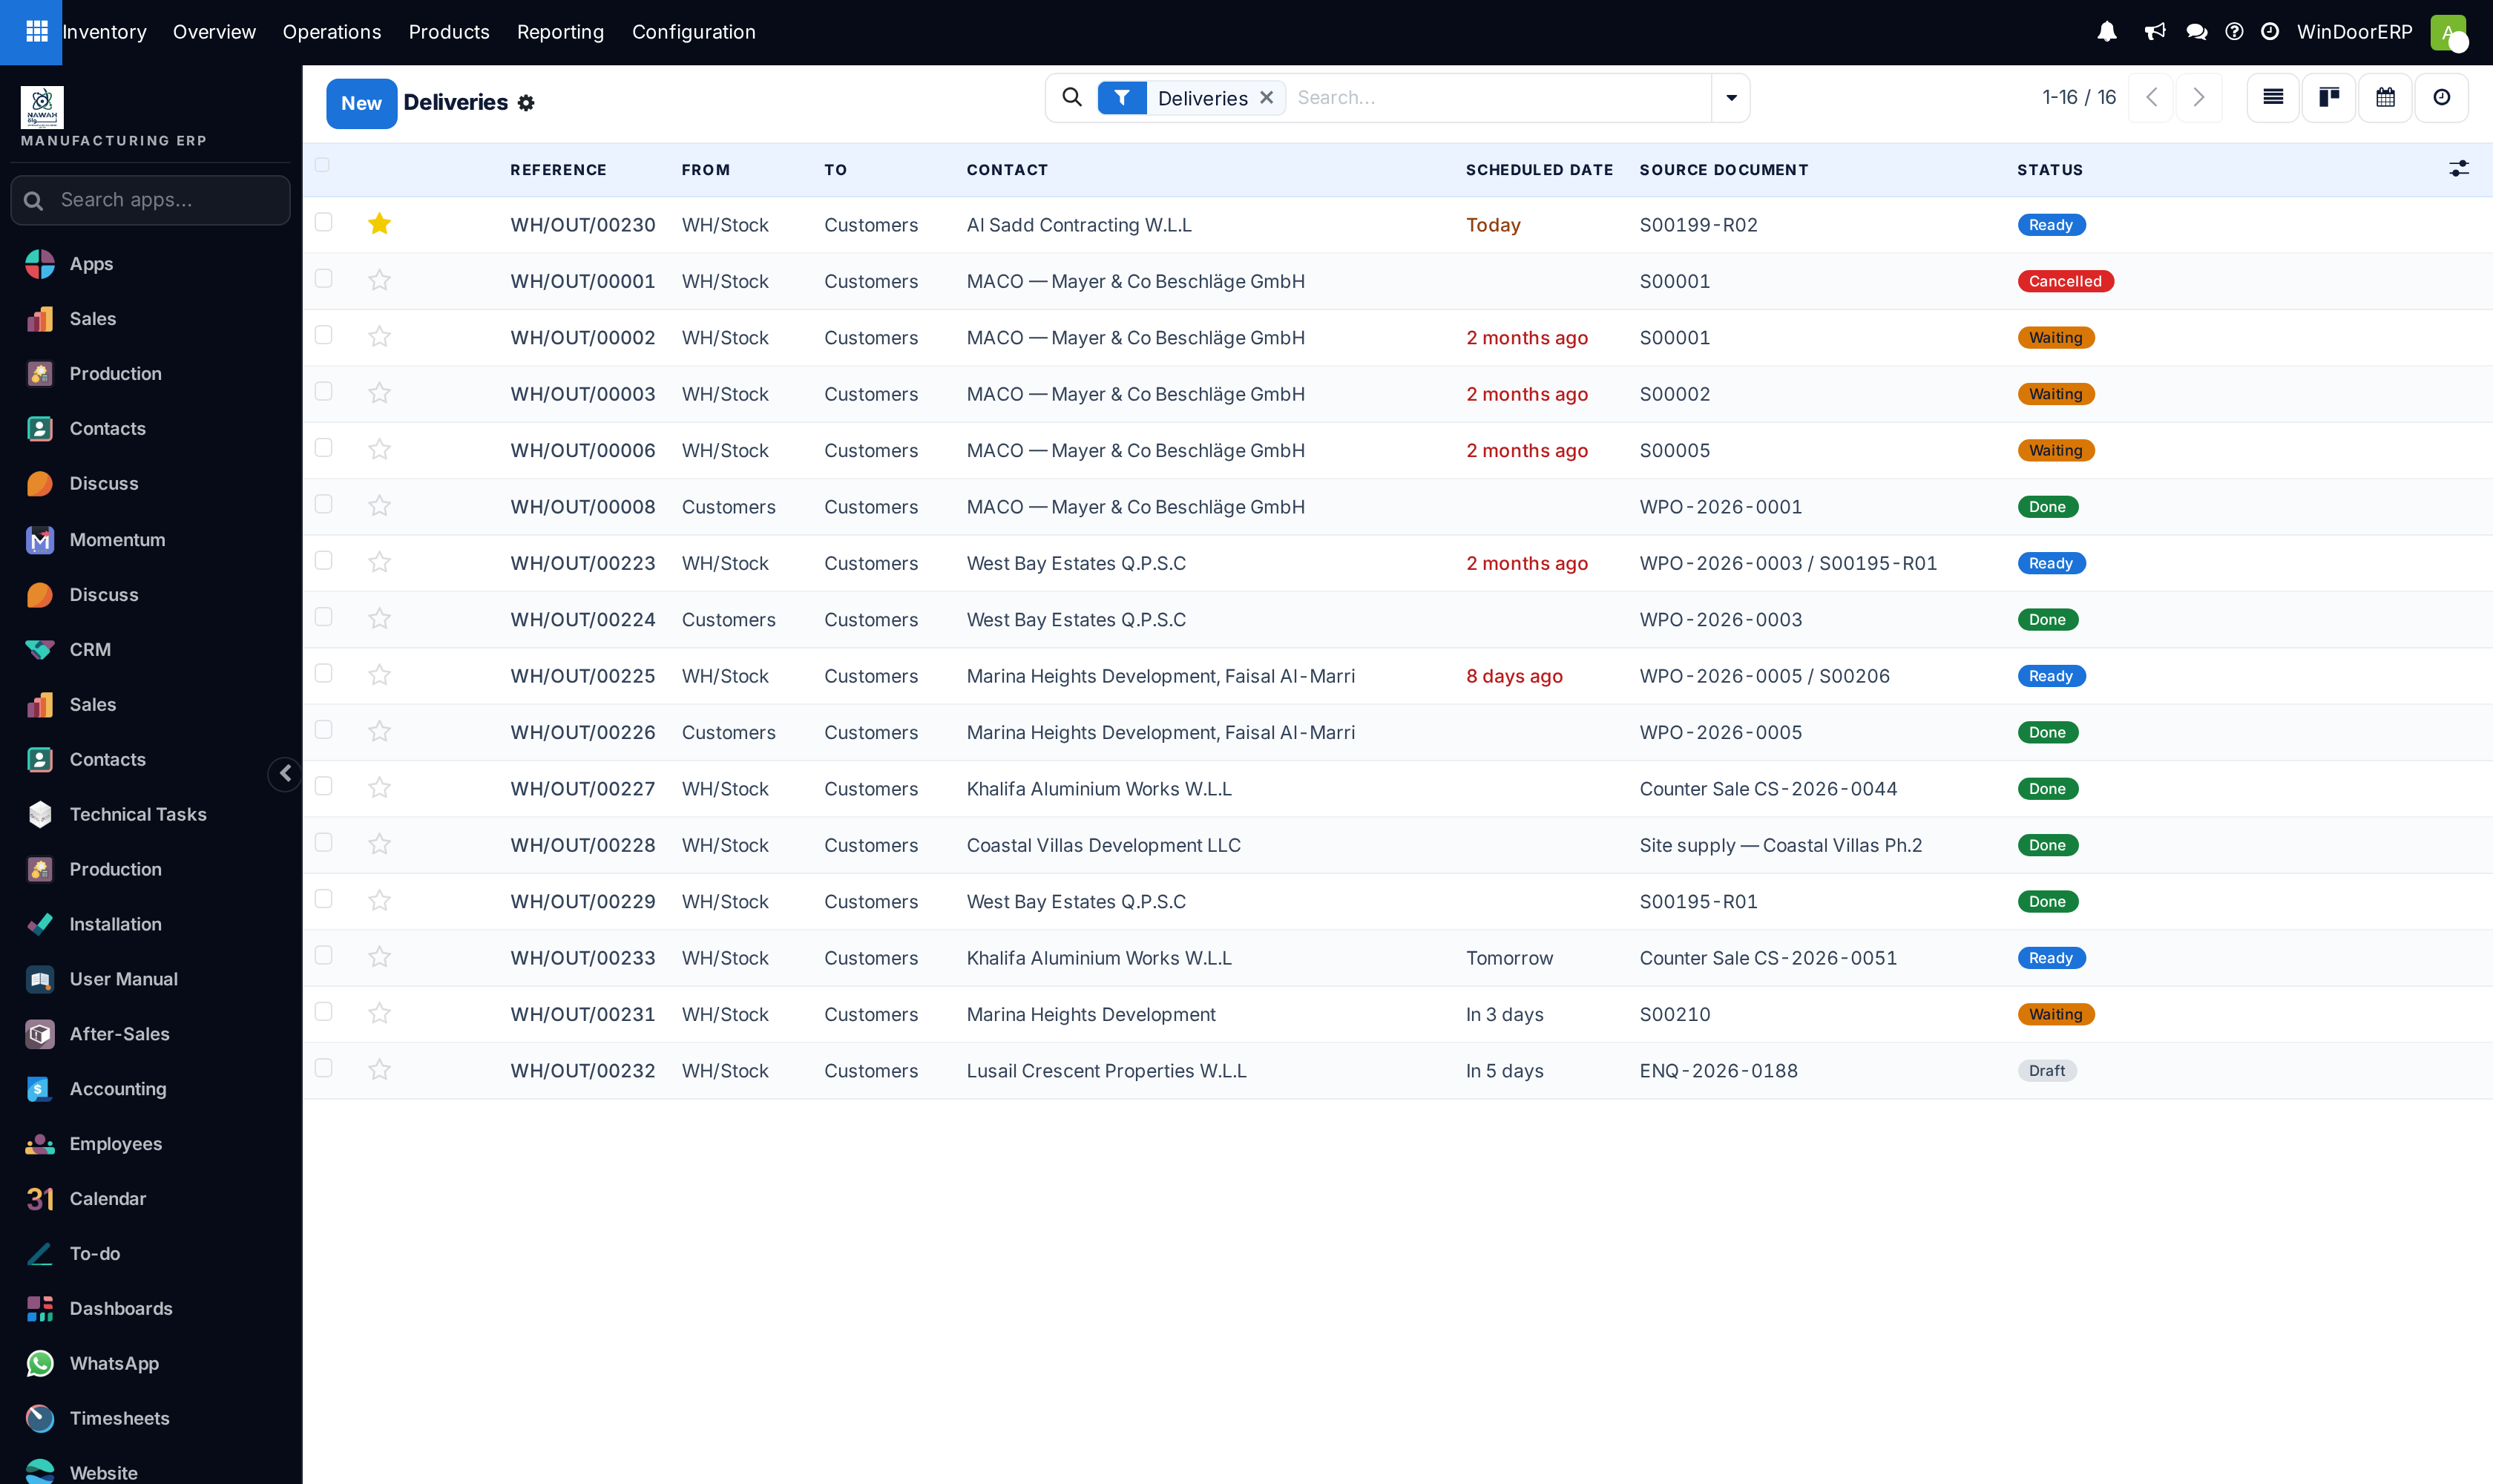
- Navigate to Inventory › Operations › Deliveries to inspect scheduled site shipments.
- Enable table columns: Carrier, Zip Code, Shipping Weight, and Shipping Volume via the column selector.
- Select delivery orders destined for the same construction sector or geographic zone.
- Click the Carrier field on the selected lines and assign the intended fleet vehicle (e.g.
Truck 1-GLS-001). - Click Actions › Add to batch (or Add to wave), select a new batch transfer, and click Confirm.
- On the generated Batch Transfer form:
- Select the Dock Location (e.g. WH/Dock 1).
- Select the specific Vehicle from your fleet.
- Set the Scheduled Date and assign a Responsible logistics supervisor.
- Inspect the real-time Weight and Volume capacity gauge bars at the top of the batch form. If the load exceeds 100%, split the order into a second wave or assign a larger flatbed truck.
3. Route Planning & Driver Navigation
- Once the batch status is set to In Progress, click the Map button on the batch transfer header.
- WindoorERP renders an interactive multi-stop map showing all delivery points, site entrance addresses, and sequence numbers.
- Click View in Google Maps to generate the live turn-by-turn navigation route for the driver's mobile device.
- Drivers scan barcoded window frames at the delivery site using the mobile barcode app and capture client digital signatures for Electronic Proof of Delivery (ePOD).
4. Transport Management Dashboard & Dock Views
From the main Inventory dashboard, click the ⋮ (three dots) menu on the Delivery Orders card to access specialized dispatch management views:
- Manage Batches: Master registry of all active and completed dispatch batches.
- Dock Dispatching: Weekly calendar scheduling dock loading slots to prevent yard congestion.
- Batches by Route: Kanban board tracking fulfillment progression across regional delivery corridors.
- Statistics: Multi-dimensional pivot table analyzing total dispatched weight, volume, and fuel efficiency.
Important
Dispatch management evaluates vehicle capacity only if weight and volume are specified on product templates. For custom fenestration assemblies, ensure the parametric estimation module writes calculated glass and aluminium BOM weights directly into the delivery lines.
Common mistakes
- Leaving product weights or volumes at 0, allowing the system to schedule impossible over-capacity loads.
- Batching deliveries by random customer order date rather than clustering by geographic site zone, forcing delivery trucks to criss-cross the city redundantly.
- Failing to assign specific loading dock bays, causing forklift gridlock in the factory dispatch yard.
- Dispatching delicate double-glazed units without securing A-frame glass transport racks.
Was this article helpful?
Thanks — your feedback helps.
Running a window or door factory?
Ask for a demo